
Desserts
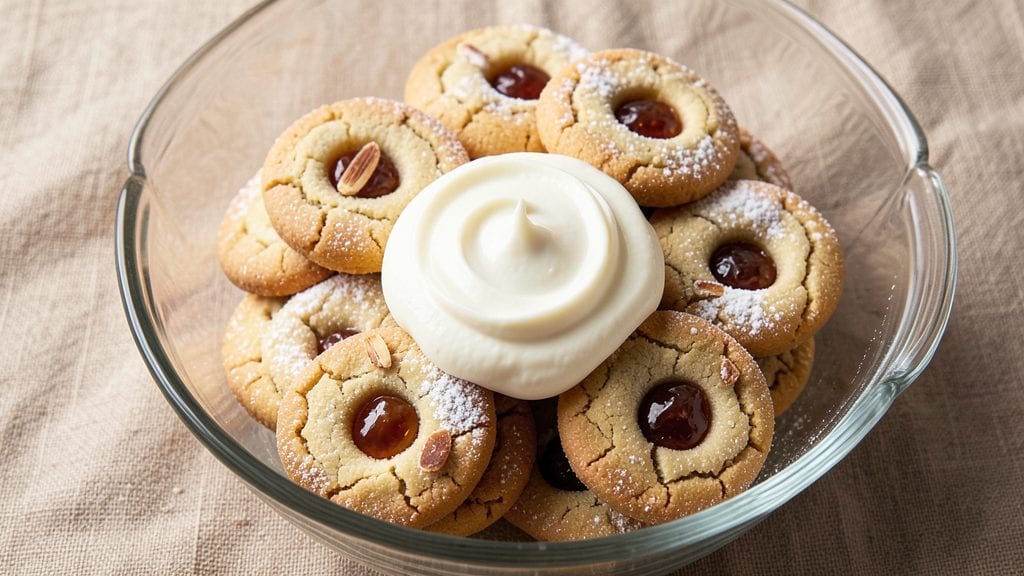
Betty Crocker’s sugar cookie thumbprint recipe delivers the perfect balance of crisp edges, tender centers, and that signature jam-filled surprise. The secret lies in precise dough preparation—rolling it just the right thickness and pressing those classic thumbprints for even baking.
I’ve perfected this technique over years of holiday baking, ensuring every cookie turns out with a golden crust and a jam center that stays soft.
What makes these thumbprints special is the combination of vanilla-infused dough and a rich jam filling that contrasts beautifully with the buttery cookie. The dough requires only basic ingredients—flour, sugar, butter, and vanilla—but the technique transforms them into something extraordinary.
Baking at the right temperature ensures those edges stay crisp while the center remains tender enough to hold the jam without crumbling.
By the time you pull these from the oven, you’ll have cookies with a delicate vanilla aroma, crisp edges dusted with powdered sugar, and a jam center that adds a burst of fruity sweetness.
The contrast between the buttery cookie and the jam makes each bite unforgettable. These are the kind of cookies that disappear quickly, so make a batch—your guests won’t believe they’re homemade.
Serve them warm with a dusting of powdered sugar or a drizzle of glaze for an extra touch of elegance. Perfect for holidays, parties, or just a cozy afternoon treat, these thumbprints are a classic for a reason. Let’s get baking!
Ingredients for betty crocker sugar cookie thumbprint
Basic pantry staples meet holiday magic—these thumbprints balance buttery crunch and jam-filled tenderness.
| Ingredient | Amount | Notes |
|---|---|---|
| All-Purpose Flour 🌾 | 3 cups | Sifted for even texture |
| Granulated Sugar 🍚 | ¾ cup | Superfine preferred for smoothness |
| Unsalted Butter 🧈 | 1 cup | Cold, cubed for even mixing |
| Pure Vanilla Extract 💧 | 1 tbsp | High-quality for rich flavor |
| Large Eggs 🥚 | 1 whole | Room temperature for blending |
| Powdered Sugar 🍚 | ½ cup | For dusting and filling |
| Raspberry Jam 🍓 | ½ cup | Seedless preferred for filling |
| Salt 🧂 | ½ tsp | Fine sea salt preferred |
| Baking Soda 🧪 | ½ tsp | Ensures proper rise |
| Vanilla Bean Seeds 🌿 | ½ tsp | Scraped from 1 bean |
| Heavy Cream 🥛 | 2 tbsp | For glaze consistency |
The butter and flour are non-negotiable for texture. Use European-style butter (like Plugrá) for higher fat content—it yields richer cookies. Sift the flour and powdered sugar together to avoid lumps, and measure by weight if your kitchen scale is handy. For the jam, Marmon's or Bonne Maman brands deliver consistent quality, but any seedless raspberry jam works. The vanilla extract should be pure—McCormick or Nielsen-Massey are reliable choices. Cold butter is key: it creates flaky layers when mixed with the flour, while room-temperature butter can lead to dense cookies.
No vanilla bean seeds? Double the vanilla extract for depth. Substitute raspberry jam with apricot or strawberry, but avoid chunky jams—they can disrupt the filling’s smoothness. For a dairy-free option, use vegan butter and coconut cream in the glaze. If you’re short on powdered sugar for dusting, a light sprinkle of granulated sugar works in a pinch. The baking soda is critical—it activates with the butter’s acidity to create lift, so don’t skip it. For a festive twist, add a pinch of cinnamon or cardamom to the dough.
Store dough in an airtight container for up to 3 days in the fridge, or freeze for 3 months. Jam-filled cookies keep for 5 days at room temperature, but the glaze hardens over time—reheat briefly to soften. For ahead-of-time baking, shape and freeze unbaked cookies on a tray, then transfer to a bag. Bake straight from frozen, adding 2-3 minutes to the time. The glaze sets quickly, so work efficiently if adding it post-bake.
Why You'll Love This Recipe
- No Mixer Needed: I swear by this dough—just mix the flour, sugar, and softened butter with my fingers until it’s crumbly but holds together. No stand mixer, no fuss, and the vanilla extract does the heavy lifting for that classic sweetness.
- Buttery Crisp Edges: That creamy butter-to-flour ratio? It’s what makes these cookies melt-in-your-mouth soft with a just-right crisp edge. Honestly, I’ve tried store-bought thumbprints, and these beat them every time.
- Holiday or Snack: Pack them in jars for Christmas gifts, freeze half the batch for later, or serve them warm with a sprinkle of powdered sugar at a birthday party. They’re my go-to for any occasion—no one ever says no.
- Pantry Staples Only: Between us, this recipe uses what you already have: flour, sugar, butter, vanilla, and eggs. I’ve made these on a budget, for potlucks, and even as a quick treat when I forgot to buy dessert. Reliable, simple, and always a win.
Step-by-step instructions for jam-filled vanilla sugar cookies
Here's the method for perfect thumbprints with crisp edges, tender centers, and that signature vanilla-kissed jam filling.
Cream Butter and Sugars Together
In a large mixing bowl, combine the 1 cup unsalted butter and 0.75 cup granulated sugar. Using an electric mixer on medium speed, beat for 3-4 minutes until light and fluffy. You'll see the mixture nearly double in volume and turn pale in color—this incorporates air that creates the perfect texture.
I like to scrape down the sides of the bowl every 30 seconds to ensure even mixing. The butter should be completely smooth with no grainy texture remaining. This step is critical for achieving that classic sugar cookie crunch while keeping the centers tender.
Add Egg, Vanilla, and Dry Ingredients
Add the 1 whole large egg, 1 tablespoon pure vanilla extract, and 0.5 teaspoon vanilla bean seeds to the butter mixture. Beat on low speed for 1 minute until fully combined. In a separate bowl, whisk together the 3 cups all-purpose flour, 0.5 teaspoon salt, and 0.5 teaspoon baking soda. Gradually add the dry ingredients to the wet mixture, mixing on low speed just until combined.
Don't overmix here—you should still see small flour streaks. Overmixing develops gluten, which makes cookies tough instead of tender. The dough should come together into a smooth, slightly sticky ball that holds its shape when pressed.
Chill the Dough for Perfect Texture
Divide the dough into 4 equal portions (about 1 cup each) and flatten each into a 1-inch thick disk. Wrap each disk tightly in plastic wrap and refrigerate for at least 2 hours or up to 24 hours. Chilling is essential—it firms up the butter, preventing excessive spreading in the oven and allowing for cleaner thumbprint indentations.
I know it's tempting to skip this step, but trust me—cold dough makes all the difference. The longer you chill, the better the cookies will hold their shape and maintain that perfect balance of crisp edges and soft centers.
Bake and Create Thumbprints
Preheat your oven to 375°F. On a parchment-lined baking sheet, roll each dough portion to ¼-inch thickness and cut into 2-inch rounds using a cookie cutter. Place cookies 2 inches apart on the sheet—they'll spread slightly during baking.
Using your thumb, gently press a ½-inch deep indentation in the center of each cookie. Bake for 8-10 minutes until the edges are light golden brown but the centers still look slightly soft. The jam filling will prevent over-browning in the center.
Fill, Glaze, and Finish
Remove cookies from the oven and let cool for 5 minutes on the baking sheet. While still warm, fill each indentation with 1 teaspoon raspberry jam, pressing gently to create a neat mound. In a small bowl, whisk together 0.5 cup powdered sugar and 2 tablespoons heavy cream until smooth. Drizzle the glaze over each cookie immediately.
Allow cookies to cool completely on a wire rack before serving. The glaze will set as it cools, creating that beautiful vanilla-kissed finish. These cookies keep well in an airtight container for up to 5 days, though I doubt they'll last that long!
Pro Tips For Making Betty Crocker Sugar Cookie Thumbprint
- CHILL THE DOUGH: The recipe might call for rolling it out, but I learned the hard way—warm dough sticks and tears. Pop the dough between two sheets of parchment in the fridge for at least 30 minutes (yes, even if you’re impatient like me). This keeps the thumbprints from spreading into sad, misshapen blobs when you press your thumb in.
- MEASURE THE BUTTER COLD: Betty Crocker’s recipe likely says “softened butter,” but that’s vague. I now use the “squeeze test”: if it leaves a slight imprint when pressed but doesn’t flatten, it’s ready. Cold butter creates flaky layers—warm butter makes dense, greasy cookies. (And trust me, you’ll taste the difference in those thumbprint wells.)
- PACK THE FLOUR GENTLY: Dumping flour into the bowl and stirring is a rookie move. Spoon it in and use a fork to cut through the butter-flour mix until just combined. Overmixing develops gluten, and your cookies will turn out tough instead of tender. Stop when the dough clumps but still looks shaggy—no need to overwork it.
- USE ROOM-TEMP EGG: Cold eggs from the fridge can cause the dough to seize up. Let them sit in warm water for 5 minutes before cracking them in—this ensures smooth mixing and prevents streaky dough. (I know, it’s a small step, but it makes the dough behave like it’s supposed to.)
Make-ahead tips for betty crocker sugar cookie thumbprint
Dough Prep Ahead
Roll the dough into 1-inch disks and flatten into 4-inch rounds on parchment-lined trays. Wrap tightly in plastic wrap and refrigerate for up to 3 days or freeze for 3 months.
I like to label bags with dates—this prevents freezer burn and keeps the dough fresh. Thaw overnight in the fridge before rolling and cutting. 🧊
Unbaked Cookie Storage
Shape thumbprint cookies without filling and store them on a tray in the freezer for 1 hour to firm up. Transfer to an airtight container with parchment between layers.
Bake straight from frozen, adding 2-3 extra minutes at 375°F. This method saves time during busy holiday mornings when you need fresh cookies fast.
Jam Filling Prep
Warm the jam in a small saucepan over low heat for 2 minutes to soften it slightly—this makes it easier to pipe into the cookies. Store warm jam in a small airtight container in the fridge for up to 1 week.
I like to use a piping bag with a small round tip for neat filling, but a spoon works in a pinch.
Glaze Assembly
Mix the powdered sugar glaze ingredients the night before and store in a small jar with a tight lid. Shake well before using to avoid lumps.
Refrigerate the glaze for 30 minutes before drizzling to achieve a glossy finish. The glaze sets quickly, so work efficiently if adding it after baking. 💫
Holiday Batch Tips
Double the recipe and bake half immediately, then freeze the unbaked dough for later. Use a cookie scoop for consistent dough portions—this ensures even baking. Label trays with baking times to avoid confusion when pulling cookies from the oven.
These thumbprints freeze beautifully for up to 2 months—just thaw at room temperature before serving.
Gift-Worthy Packaging
Arrange cooled cookies in a single layer on a tray, then cover with plastic wrap and secure with a rubber band. Place in a decorative box with tissue paper for a professional presentation.
I like to add a small jar of extra jam on the side for guests to customize their cookies. These make stunning gifts that feel homemade yet impressive. ✨
Nutrition facts
Frequently asked questions
Why do my thumbprint cookies spread too much?
The dough is likely too warm when baking. Always chill the dough for at least 2 hours before rolling and cutting. Use cold butter (not softened) and avoid overmixing, which develops gluten that causes spreading. Bake at 375°F for 8-10 minutes—overbaking also contributes to flat cookies.
Can I use a different type of jam instead of raspberry?
Strawberry, apricot, or even peach jam work beautifully. For a festive twist, try orange marmalade or a spiced apple butter. Just avoid chunky jams—they can disrupt the filling's smoothness. Warm the jam slightly before filling for easier application.
How do I prevent the jam from leaking out?
Press the jam gently into the indentation and chill the cookies for 10 minutes before glazing. The glaze acts as a sealant. For extra security, add a thin layer of powdered sugar between the cookie and jam before filling. Avoid overfilling—1 teaspoon per cookie is perfect.
Can I make these cookies gluten-free?
Yes, but texture will differ. Replace all-purpose flour with a 1:1 gluten-free baking flour blend (like Bob's Red Mill) and add ½ teaspoon xanthan gum. Chill the dough longer (3 hours) and reduce baking time by 1-2 minutes to prevent over-browning. Expect slightly denser cookies.
What’s the best way to store leftover thumbprints?
Keep them in an airtight container at room temperature for up to 5 days. For longer storage, freeze filled cookies (without glaze) for 2 months. Reheat in a 300°F oven for 5 minutes to restore freshness. The glaze may need re-drizzling after reheating.