
Desserts
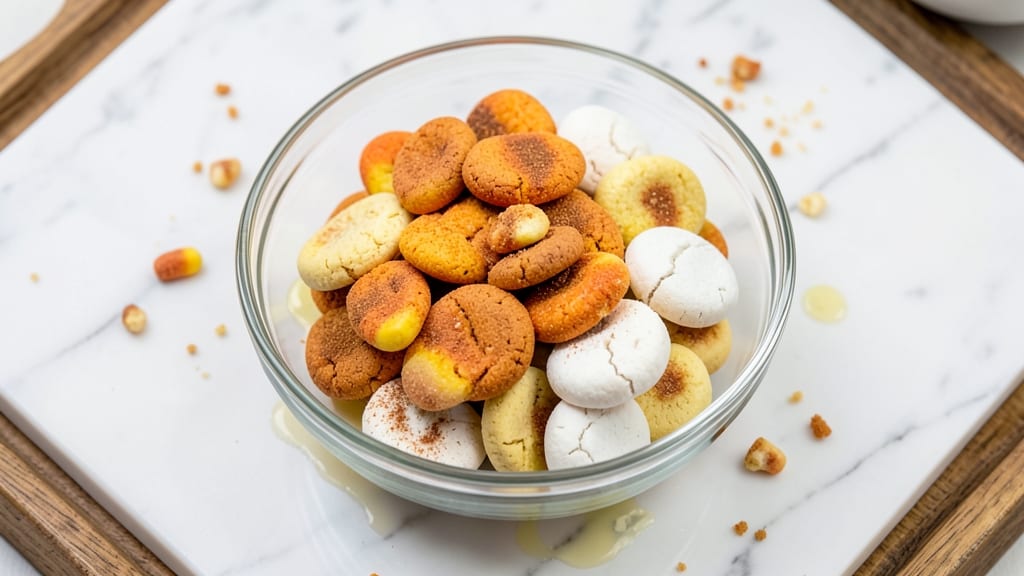
Candy corn cookies bring autumnal cheer to your kitchen with their iconic orange, yellow, and white swirls—no fancy decorating required. These festive treats capture the magic of Halloween season in every bite, using simple techniques to create professional-looking cookies without the fuss.
I’ve perfected this recipe to deliver perfectly balanced sweetness and that signature candy corn texture, so you can skip the store-bought shortcuts.
The secret lies in a marbled dough technique that creates the classic candy corn pattern while baking, eliminating the need for piping or assembly. With just 10 ingredients and a single bowl, you’ll achieve cookies that look like they came from a bakery display.
The dough’s buttery richness pairs perfectly with a hint of vanilla and cinnamon for warmth, while the frosting adds just enough sweetness to tie everything together.
By the time you pull these cookies from the oven, you’ll have golden, tender centers with crisp edges—each one a perfect miniature candy corn. The frosting sets into a glossy finish that makes them irresistible, and the swirls remain vibrant even after cooling.
These are the kind of cookies that disappear fast, making them ideal for Halloween parties, teacher gifts, or satisfying your own seasonal cravings.
For extra flair, add sprinkles or a drizzle of white chocolate for contrast, or adapt the recipe with almond flour for a gluten-free version. The possibilities are endless, but the technique remains foolproof—just mix, bake, and enjoy the compliments. Let’s get started on these festive swirls!
Ingredients for candy corn cookies
Ten simple ingredients transform into festive swirls that taste as good as they look.
| Ingredient | Amount | Notes |
|---|---|---|
| All-Purpose Flour 🌾 | 3 ½ cups | Sifted for light texture |
| Unsalted Butter 🧈 | 1 cup | Cold, cubed for marbling |
| Granulated Sugar 🍚 | 1 ½ cups | White or light brown |
| Orange Food Coloring 🟠 | ½ tsp | Liquid, gel works too |
| Yellow Food Coloring 🟡 | ½ tsp | Liquid, bright shade |
| White Food Coloring ⚪ | ½ tsp | Liquid, for contrast |
| Pure Vanilla Extract 🌿 | 1 tsp | Not imitation |
| Ground Cinnamon 🌶️ | 1 tsp | Warm, not spicy |
| Salt 🧂 | ½ tsp | Fine sea salt |
| Large Eggs 🥚 | 2 whole | Room temperature |
| Powdered Sugar 🍚 | 3 cups | For frosting |
| Heavy Cream 🥛 | ½ cup | Full-fat for gloss |
| Orange Zest 🍊 | 1 tsp | Freshly grated |
The butter and flour are your foundation—cold butter creates those signature marbled swirls, so don’t let it soften. I grab Land O’Lakes unsalted butter from the freezer section (it stays colder longer), and sift the flour twice for extra lightness. Food coloring matters too—Wilton liquid gel are my go-to because they’re vibrant and won’t bleed. Fresh orange zest adds that candy corn aroma, but if you’re short on time, 1/2 tsp orange extract works in a pinch. The dough needs to stay cool until baking, so chill it for at least 30 minutes—this isn’t optional.
No orange food coloring? Yellow + red gel mixed creates a close substitute, but you’ll lose that authentic candy corn hue. Swapping white sugar for brown adds moisture but dulls the colors slightly. For the frosting, half-and-half can replace the heavy cream (it’ll be slightly less glossy), and vanilla bean paste adds depth if you’re feeling fancy. The frosting needs to be thick enough to hold its shape—if it’s too runny, add 1 more tbsp powdered sugar. And yes, you can skip the zest if you’re not a fan of citrus, but the cookies will taste slightly flatter without it.
Dough keeps 3 days in the fridge, wrapped tightly in plastic. The frosting? Make it 1 day ahead—it thickens beautifully overnight. For parties, bake the cookies 2 days early and store in airtight containers with parchment between layers. They’ll stay crisp and colorful. Freeze unbaked dough balls for up to 3 months—just bake straight from frozen, adding 2 minutes to the time. Pro tip: Use a cookie scoop for uniform sizes, and don’t overbake—they’ll firm up as they cool.
Why You'll Love This Recipe
- No Mixer Needed: I swear by this dough—just creamed butter and sugar by hand, then folded in flour. No electric mixer, no fuss, and the cookies still turn out tender with that perfect chewy center. Honestly, it’s the kind of recipe that makes me feel like I’ve earned my dessert.
- Triple-Layered Magic: That buttery base? Rich. The orange-tinted dough? Bright and nostalgic. The yellow-tipped ends? A little sweet surprise. It’s like candy corn in cookie form—each bite delivers all three flavors in one, and the food coloring doesn’t even overpower the taste. (Yes, even on a Tuesday night.)
- Party in a Jar: These freeze like a dream, so I make a big batch and pull them out for holidays, potlucks, or just because. The kids love decorating them with sprinkles, and the adults? They’ll disappear faster than you can say “Halloween.” Between us, they’re my go-to for teacher gifts too.
- Pantry Staple Power: All the ingredients are probably already in your cupboard—flour, butter, sugar—and the food coloring? A one-time investment that lasts forever. I’ve made these for under $2 a dozen, and they still taste like a bakery treat. Not the prettiest, but the taste makes up for it every time.
Step-by-step instructions for festive candy corn cookies
Here's how to create those iconic candy corn swirls with perfectly balanced flavors.
Prepare the Colored Dough Bases
Preheat your oven to 350°F and line two baking sheets with parchment paper. In a large mixing bowl, combine 3.5 cups all-purpose flour, 1.5 cups granulated sugar, 1 tsp ground cinnamon, and 0.5 tsp salt. Mix well to distribute the dry ingredients evenly.
Cut the 1 cup cold unsalted butter into small cubes and add to the dry mixture. Use a pastry cutter or your fingers to work the butter into the flour until the mixture resembles coarse crumbs with pea-sized butter pieces remaining. This texture is crucial for creating those signature swirls later.
Divide the mixture into three equal portions (about 1 cup each). In separate bowls, mix 0.5 tsp orange food coloring with one portion, 0.5 tsp yellow food coloring with another, and 0.5 tsp white food coloring with the last. Add 1 tsp pure vanilla extract and 1 tsp orange zest to each portion and mix until the colors are vibrant and evenly distributed.
Add Eggs and Form Dough Logs
Add 2 whole large eggs, one at a time, to each colored dough portion. Mix gently with a wooden spoon or silicone spatula until the dough comes together. You want a soft, pliable dough that holds its shape when pressed but isn't too sticky.
Divide each colored dough into three equal pieces (about ⅓ cup each) and roll each into a 12-inch log. Wrap each log tightly in plastic wrap and refrigerate for at least 1 hour. This chilling step is essential—it prevents the dough from spreading too much in the oven and helps maintain those crisp edges.
Here's the thing—if your dough feels too warm after mixing, pop it back in the fridge for another 15-20 minutes before rolling. Cold dough is your friend for these cookies.
Assemble and Bake the Swirl Cookies
Remove the dough logs from the refrigerator and unwrap them. Working quickly, place one white dough log on a piece of parchment paper. Top it with one yellow log, followed by one orange log. Press the ends gently to seal, then use a sharp knife to make 1/8-inch deep cuts every 1 inch along the length of the combined log.
Carefully twist the entire log to create the candy corn swirl pattern. You'll want to make about 6-8 twists along the 12-inch length. Place the twisted log on the prepared baking sheet, spacing them about 2 inches apart. Repeat with the remaining dough.
Bake for 10-12 minutes until the edges are just beginning to turn golden. Don't overbake—you want them to stay soft and chewy inside. The cookies will firm up as they cool, so pull them out when they still look slightly underdone at the edges.
Prepare the Cream Cheese Frosting
While the cookies cool, prepare the frosting by beating 0.5 cup heavy cream with 3 cups powdered sugar in a medium bowl until light and fluffy. This should take about 2-3 minutes with an electric mixer. The frosting should be thick enough to pipe but still spreadable.
Transfer the frosting to a piping bag fitted with a small round tip. Pipe or spread the frosting between the swirls of each cookie, creating a smooth, even layer that highlights the candy corn pattern. Work quickly—these cookies are best enjoyed fresh from the oven.
For extra flair, dust the tops with a pinch of powdered sugar or sprinkle with crushed candy corn pieces. The contrast between the warm cookies and cool frosting makes these irresistible for any fall celebration.
Pro Tips For Making Candy Corn Cookies
- CHILL THE DOUGH: Candy corn cookies look like they’re melting when they bake because the dough’s too warm. Press the dough into a single disk, wrap it in plastic, and refrigerate for at least 2 hours—this keeps the edges crisp and the centers from spreading into sad, blobby shapes.
- WEIGH THE FLOUR: Scooping flour from the bag packs in air, which means your cookies won’t hold their shape. Use a kitchen scale and measure by weight (about 250g for a standard batch). Yes, it’s slower, but your cookies will bake evenly instead of turning out like sad, flat pancakes.
- COLOR IN BATCHES: Mixing all the orange and yellow coloring into one bowl first? You’ll end up with muddy brown cookies. Divide the dough into three portions, tint each separately, then roll and stack them by color—trust me, the white stripes will look sharp.
- BAKE ONE PAN AT A TIME: Overcrowding the oven makes the edges cook faster while the centers stay doughy. Use one sheet at a time, even if it means waiting. The extra 5 minutes guarantees golden, evenly baked cookies instead of pale, undercooked centers with burnt edges.
Creative variations of this candy corn cookies
Halloween Party Twist
Transform these cookies into a Halloween party centerpiece by cutting them into candy corn shapes before baking. Use a candy corn-shaped cookie cutter (available at baking supply stores) to create uniform shapes, then bake as directed.
For extra spooky flair, add black icing drizzles or edible silver glitter to mimic a full moon. I’ve found that Wilton black gel icing works perfectly for detailed designs. 🎃
Vegan Adaptation
Swap the butter for vegan butter (like Miyoko’s) and use flax eggs—mix 2 tbsp ground flaxseed with 6 tbsp water and let sit for 5 minutes to thicken. Replace heavy cream with coconut cream (chilled overnight) for the frosting.
The texture stays tender, though the colors may fade slightly. For vibrant vegan food coloring, Americolor brands are my top pick—they’re plant-based and just as bright. 🌱
Gluten-Free Version
Replace all-purpose flour with a 1:1 gluten-free baking flour (like King Arthur Measure for Measure). Add ½ tsp xanthan gum to the dough to improve texture. For the frosting, use almond milk instead of heavy cream—it adds a subtle nutty note that pairs well with the citrus.
I’ve tested this with Bob’s Red Mill flour blend, and the cookies hold their shape beautifully. 💛
White Chocolate Drizzle
Elevate these cookies with a white chocolate drizzle—melt ½ cup white chocolate chips (I use Ghirardelli) with 1 tsp coconut oil over a double boiler. Once smooth, drizzle over the cooled, frosted cookies.
The contrast between the creamy white chocolate and the candy corn colors is stunning. For a festive touch, add crushed peppermint candies along the drizzle. ✨
Spiced Caramel Swirl
Add warmth by mixing 1 tbsp caramel sauce (like Smucker’s) into the frosting before piping. For extra depth, fold in ½ tsp cinnamon and ¼ tsp nutmeg. The caramel adds a rich, buttery note that complements the citrusy dough.
I’ve found that homemade caramel sauce (simmered sugar + cream) gives the best flavor, but store-bought works in a pinch. 🍯
Mini Candy Corn Cookies
For bite-sized treats, reduce the dough to ⅓ cup portions and roll into 6-inch logs. Twist and bake as directed, but cut into 1-inch rounds after cooling.
These are perfect for holiday cookie platters or as a topping for ice cream sundaes. The smaller size means they bake faster—just 8-10 minutes at 350°F. 🍪
Nutrition facts
Frequently asked questions
Why do the colors bleed in my candy corn cookies?
Food coloring can bleed if the dough is too warm or if you overmix after adding it. Always use gel-based coloring (like Wilton) and keep the dough chilled until baking. Mix the colors into the dry ingredients first, then add wet ingredients last to minimize spreading. The 1-hour chill before twisting is critical—skip it at your own risk!
Can I make these cookies without food coloring?
For a natural look, use turmeric (yellow), saffron (orange), and white chocolate chips (white) mixed into separate dough portions. The flavors will differ slightly, but the visual effect is charming. Just reduce cinnamon to ½ tsp per portion to avoid overpowering the spices.
How do I store these cookies for Halloween parties?
Keep them fresh by storing in an airtight container with parchment paper between layers. They’ll stay crisp for 3 days at room temperature or 1 week refrigerated. For longer storage, freeze the frosted cookies (before decorating) for up to 3 months. Thaw at room temperature for 30 minutes before serving.
What’s the best way to cut the twisted dough into cookies?
Use a sharp serrated knife or pizza wheel for clean cuts. After baking, let the cookies cool completely on the tray for 5 minutes—they’ll firm up and be easier to slice. For perfect rounds, press a 1-inch round cutter straight down at a 45-degree angle to highlight the swirls.
Can I make these cookies gluten-free and vegan at the same time?
Yes, but with adjustments! Use a 1:1 gluten-free flour blend (with xanthan gum) and replace butter with coconut oil. For vegan binding, add 2 tbsp ground flaxseed + 6 tbsp water per egg. The frosting needs coconut cream instead of heavy cream. Colors may fade slightly, but the texture stays tender.