
Desserts
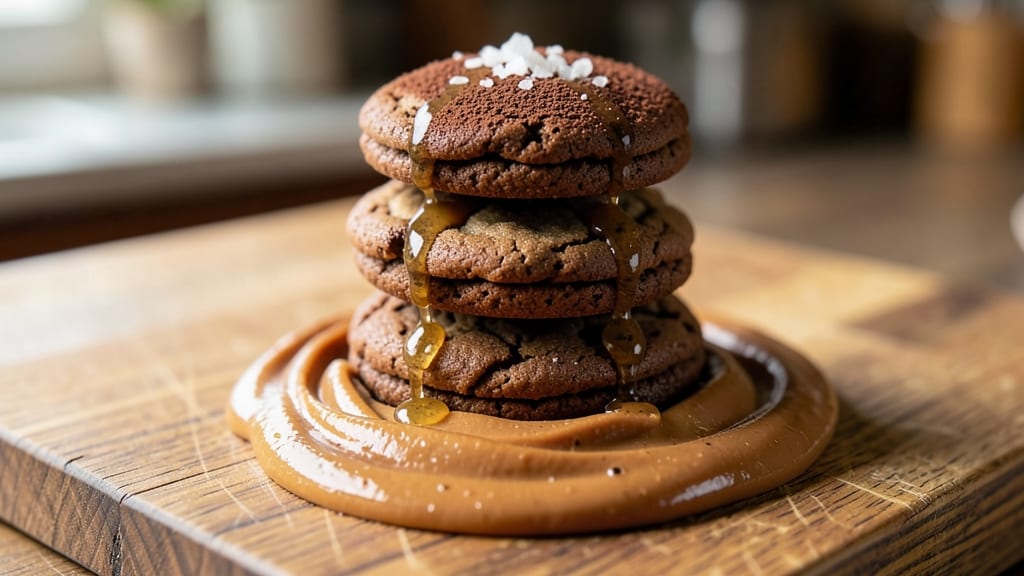
This classic no-bake cookie recipe is the perfect solution for hot days when you crave something sweet but don’t want to turn on the oven. ✨ The secret lies in just three ingredients—creamy peanut butter, sweet honey, and rich cocoa powder—that come together in minutes and require no baking at all.
I’ve been making these since my first summer job, and they’ve never failed to impress.
The beauty of no-bake cookies is their simplicity: no flour, no eggs, and no oven needed. You’ll mix the ingredients until smooth, roll into balls, and chill until firm—no fancy equipment required. The result? Rich, fudgy cookies with a velvety texture and a satisfying snap that’s impossible to resist.
These cookies stay fresh for days in the fridge, making them ideal for potlucks, picnics, or a quick dessert when cravings strike. The combination of peanut butter and chocolate creates a flavor so addictive, you’ll want to double the batch. Ready to make dessert without the heat?
Perfect for warm weather or when you’re short on time, these cookies prove that great desserts don’t always require an oven. Let’s get started—your taste buds will thank you.
Ingredients for classic no bake cookie
Three core ingredients plus a few optional extras—no oven, no stress, just pure summer dessert magic.
| Ingredient | Amount | Notes |
|---|---|---|
| Creamy Peanut Butter 🥜 | 1 cup | Natural, unsweetened preferred |
| Honey 🍯 | ¾ cup | Raw or clover variety |
| Unsweetened Cocoa Powder 🍫 | ½ cup | Dutch-processed for smoother taste |
| Vanilla Extract 🌸 | 1 tsp | Pure vanilla for best flavor |
| Sea Salt 🧂 | ¼ tsp | Fine grain for even sprinkle |
| Unsalted Butter 🧈 | ¼ cup | Softened for easy mixing |
| Mini Chocolate Chips 🍫 | ½ cup | Optional for extra richness |
| Crushed Peanuts 🥜 | ¼ cup | For topping, optional |
The peanut butter is where it all starts. Natural, unsweetened gives the best texture and flavor, but if that's not what you've got, any creamy peanut butter will work. I always grab Jif Natural from the store—it's consistent and affordable. The honey should be thick and golden; clover or raw varieties add depth. For the cocoa powder, Dutch-processed (like Hershey's Special Dark) makes these cookies smoother and richer. If you're using regular cocoa, add a pinch more salt to balance the bitterness. The vanilla extract? Pure Madagascar bourbon is ideal, but imitation works in a pinch.
No vanilla? A scratch-made vanilla sugar (mix 1 tbsp sugar with 1/2 tsp vanilla) works great. Running low on cocoa powder? Melted chocolate (1/4 cup) plus 1/4 cup cocoa gives a deeper flavor. The butter needs to be softened—microwave it for 20 seconds if it's cold. Optional extras like chocolate chips or crushed peanuts? Trader Joe's has the best mini chips, and I always buy the salted peanuts for topping. They add crunch and a salty contrast that makes these cookies irresistible.
These cookies firm up as they chill, so plan ahead. Roll them into balls, place on a tray, and refrigerate for at least 2 hours—or overnight for extra firmness. Store in an airtight container in the fridge for up to 5 days. They're perfect for picnics, potlucks, or just a quick treat when you're craving something sweet. Freeze extras for up to 3 months—just thaw at room temperature before serving. Trust me, they taste even better the next day.
Why You'll Love This Recipe
- No Mixing Needed: I swear by this recipe because it’s just three ingredients, a bowl, and your hands—no fancy tools, no waiting for dough to chill. The peanut butter and honey melt together so smoothly, and the cocoa powder just folds right in.
- Rich, Grown-Up Bite: That pinch of sea salt? Everything. It cuts through the sweetness and makes the vanilla and peanut butter sing—like a chocolatey hug with a little sophistication. Honestly, it’s the kind of treat that feels indulgent but isn’t.
- Party or Pantry: These hold up for days in an airtight container, so I make a batch on Sundays and stash them for last-minute gifts, lunchboxes, or when I’m craving something sweet but don’t want to turn on the oven. (Yes, even on a Tuesday night.)
- Budget-Friendly Magic: Peanut butter, honey, and cocoa powder? That’s it. No weird ingredients, no markup—just pure, satisfying flavor for pennies. I’ll be real: my grocery list always includes these staples because they’re the secret to happy, well-fed moments.
Step-by-step instructions for classic no-bake cookies
Here's how to make these effortless, rich cookies with no oven required.
👨🍳 Step 1: Mix the Base Ingredients
In a medium mixing bowl, combine the 1 cup creamy peanut butter and 0.75 cup honey. Use a wooden spoon or silicone spatula to mix until smooth and fully blended. The mixture should look like a thick, glossy paste with no lumps remaining. This is your cookie dough foundation.
Next, add the 0.5 cup unsweetened cocoa powder, 1 tsp vanilla extract, and 0.25 tsp sea salt. Stir vigorously until everything is completely incorporated. You'll notice the mixture darkens slightly as the cocoa powder dissolves. This step is crucial for developing the deep chocolate flavor that makes these cookies so irresistible.
🍳 Step 2: Incorporate the Butter and Fold in Add-Ins
Add the 0.25 cup softened unsalted butter to the bowl and mix until fully combined. The butter should blend smoothly, making the dough more pliable and easier to shape. This is where the texture transforms from thick paste to workable cookie dough.
Now fold in the 0.5 cup mini chocolate chips and 0.25 cup crushed peanuts using your spatula. Be gentle to avoid breaking the chocolate chips. The dough will look speckled with chocolate and peanut pieces. If it's too sticky to handle, chill for 10 minutes in the refrigerator while you prepare your baking sheets.
🥘 Step 3: Shape and Chill the Cookies
Using a cookie scoop or tablespoon, portion the dough into 1-inch balls and place them 2 inches apart on a parchment-lined baking sheet or plate. Don't worry about perfect shapes—they'll look rustic and homemade. For extra texture, gently press a few crushed peanuts into the tops of each cookie.
Cover the baking sheet with plastic wrap and refrigerate for atstrong>30 minutes or until the cookies are firm enough to handle without sticking. This chilling step is essential for setting the shape and preventing the cookies from spreading too much during storage. The longer you chill them, the more defined their edges will be.
⏰ Step 4: Store and Enjoy
Once chilled, transfer the cookies to an airtight container and refrigerate for at least 1 hour before serving. This final resting period allows the flavors to meld together beautifully. The cookies will keep in the fridge for up to 1 week or can be frozen for 3 months for a quick treat.
When ready to serve, let the cookies sit at room temperature for 5-10 minutes to soften slightly. They'll be rich, fudgy, and packed with peanut butter flavor, with just the right amount of chocolate and nutty crunch. Perfect for warm weather when you want something sweet without turning on the oven!
Pro Tips For Making Classic No Bake Cookie
- Warm the peanut butter: Dump the jar straight from the fridge into the mix, and you’ll end up with a grainy, uneven dough. Microwave it for 10–15 seconds first—just until it’s soft enough to stir smoothly. Trust me, your cookies won’t clump like sad, lumpy blobs.
- Sift the cocoa first: Unsweetened cocoa powder has a mind of its own and loves to clump. Sift it directly into your mixing bowl before adding anything else—no lumps, no measuring headaches. (Pro move: Use a fine-mesh sieve, not a cheap strainer.)
- Chill the dough longer: Skip the 30-minute fridge rest, and your cookies will stick to your hands like glue. Give it a full hour, or even overnight if you’re patient. The longer it rests, the cleaner the cuts and the firmer the shape—no messy fingerprints on your cookies.
- Roll thin, cut small: Thick dough = chewy, dense cookies. Roll it to about ¼-inch thickness, and use a cookie cutter or knife to cut into even 1-inch pieces. Smaller bites = better texture, and they’ll crisp up faster when stored. (Bonus: Less waste.)
Best sauces and condiments for this classic no bake cookie
Peanut Butter Sauce
Drizzle warm peanut butter sauce over chilled cookies for extra richness. Heat ½ cup creamy peanut butter with ¼ cup honey and 2 tbsp milk in a saucepan over low heat until smooth.
Thin with more milk if needed, then drizzle over cookies just before serving. I love adding a pinch of cayenne pepper for subtle heat. 🥜
Chocolate Ganache
Melt ½ cup dark chocolate chips with ¼ cup heavy cream in a microwave-safe bowl in 30-second intervals, stirring until silky. Let cool slightly, then drizzle over cookies.
For a firmer finish, chill the ganache for 10 minutes before using. This adds a glossy, luxurious touch that pairs perfectly with the peanut butter base.
Caramel Drizzle
Make a quick caramel by melting ½ cup granulated sugar in a saucepan over medium heat until amber-colored. Slowly whisk in 2 tbsp butter and 2 tbsp heavy cream.
Drizzle over cookies while still warm for a sticky, sweet contrast. I like to sprinkle flaky sea salt on top right after for balance. ⚡
Nutella Swirl
Warm ¼ cup Nutella in the microwave for 15 seconds, then swirl it onto the tops of cookies with a spoon. Chill for 10 minutes to set, then slice into wedges for a decadent dessert.
This adds a hazelnut-chocolate depth that elevates the classic combo. Store leftovers in the fridge for up to 5 days.
Spiced Honey Glaze
Combine ¼ cup honey with ½ tsp cinnamon, ¼ tsp ginger, and a pinch of cardamom in a small saucepan. Heat until bubbly, then brush over cookies while still chilled. The warm spices complement the peanut butter beautifully and add a cozy twist. 🌶️
Nutrition facts
Frequently asked questions
Why do I need to chill these cookies before eating?
Chilling is key for texture and shape—these cookies firm up in the fridge, giving them a satisfying fudgy yet firm bite. The longer you chill (up to 24 hours), the more defined their edges become. Without chilling, they'll be too soft to handle and may flatten during storage.
Can I make these cookies without peanut butter?
Swap the peanut butter for 1 cup sunflower seed butter (for nut-free) or ½ cup tahini plus ½ cup almond butter for a different flavor profile. The texture stays rich, but the taste will shift toward nutty or sesame-forward notes. Adjust honey slightly if your butter is sweeter.
How do I fix dough that's too sticky to roll?
If your dough is too soft, pop it in the fridge for 10-15 minutes to firm up. For extra insurance, wet your hands slightly before shaping—this prevents sticking. If it's still too sticky, add 1-2 tablespoons more cocoa powder to absorb moisture while mixing.
Are these cookies safe to eat without baking?
Yes! Since they're made with shelf-stable ingredients (peanut butter, honey, cocoa) and no raw eggs, they're safe to eat straight from the fridge. The butter and chocolate chips are pasteurized, so no cooking is needed. Just ensure all ingredients are properly stored before mixing.
What's the best way to serve these at a picnic?
Pack them in an airtight container with parchment paper between layers to prevent sticking. Bring a small bowl of warm peanut butter sauce for dipping—it melts beautifully on these cookies! Store in a cooler with ice packs to keep them firm until serving.