
Desserts
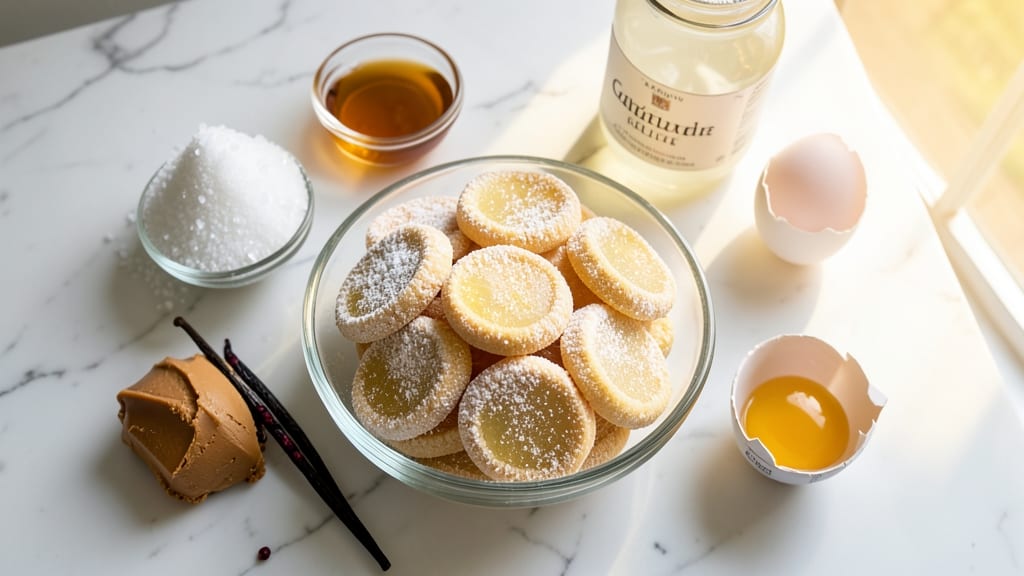
This Jello sugar cookies recipe delivers the perfect balance of shatterproof edges and chewy centers—no one will guess they're secretly made with gelatin. The key lies in blooming the gelatin properly and incorporating it into the dough at just the right temperature to create that signature texture.
After years of testing variations, I've perfected a method that yields cookies with clean breaks and a satisfying snap, while maintaining a tender interior.
The process begins with preparing the gelatin mixture, which adds structure without altering the sweet, vanilla flavor you'd expect from sugar cookies. You'll work with a simple dough that's rolled, cut, and baked to golden perfection, then cooled to achieve that coveted crispness.
This recipe uses basic pantry ingredients but delivers restaurant-quality results that will impress even the most discerning dessert lovers.
What makes these cookies truly special is their versatility—they hold their shape beautifully for decorating while still offering that satisfying chewy bite. Whether you pipe intricate designs or keep them simple with classic icing, the texture remains consistent.
The secret technique ensures every batch turns out with that professional bakery quality you've been searching for.
Ready in just 30 minutes from start to finish, these cookies are perfect for holidays, gift-giving, or satisfying that afternoon sweet tooth. The recipe scales easily for parties, and the dough can be chilled in advance for stress-free baking. Let's create cookies that will have everyone asking for the recipe!
Ingredients for jello sugar cookies
Basic pantry staples plus one secret ingredient—gelatin—for cookies with restaurant-quality texture.
| Ingredient | Amount | Notes |
|---|---|---|
| Unsalted Butter 🧈 | ½ cup | Cold, cubed for dough texture |
| Granulated Sugar 🍚 | 1 cup | White, fine grain preferred |
| Light Corn Syrup 🍯 | ¼ cup | For chewy texture consistency |
| Large Eggs 🥚 | 1 whole | Room temperature for blending |
| Pure Vanilla Extract 🌿 | 1 tbsp | High-quality, no alcohol |
| Unflavored Gelatin 🍬 | 2 tsp | Powdered, not sheet gelatin |
| Warm Water 💧 | ¼ cup | 160°F for proper blooming |
| All-Purpose Flour 🌾 | 2 ½ cups | Sifted for light texture |
| Baking Powder 🧂 | ½ tsp | Aluminum-free preferred |
| Salt 🧂 | ¼ tsp | Fine sea salt preferred |
| Powdered Sugar 🍚 | 2 cups | For final coating |
| Vanilla Icing Color 🎨 | ¼ tsp | Optional, for classic look |
| Heavy Cream 🥛 | ¼ cup | For royal icing consistency |
The gelatin is non-negotiable for that signature snap. Great Lakes or Knox brands work best—avoid pre-flavored varieties. For the butter, Land O'Lakes or Plugrá (European-style) give superior texture. The corn syrup should be light, not dark—Karo is the gold standard. Sift your flour thoroughly; lumps create dense cookies. If you're baking at high altitude, reduce the baking powder to 0.25 tsp to prevent spreading.
No gelatin? Agar-agar at double the amount works, but texture won't be identical. Substitute corn syrup with maple syrup or honey, but reduce other liquids by 0.1 cup. For the icing, powdered sugar from Domino dissolves smoothly. If you prefer royal icing without color, add 1 tbsp meringue powder instead. The dough can be chilled up to 48 hours—this actually improves texture by reducing gluten development.
Store cookie dough in an airtight container with parchment between layers for up to 5 days. Baked cookies keep 3 days at room temperature in a sealed tin. For long-term storage, freeze dough balls on a tray first, then transfer to a bag for 3 months. The icing hardens as it dries—cover with a damp towel to prevent cracking. These cookies reheat beautifully in a 200°F oven for 5 minutes to restore chewiness.
Why You'll Love This Recipe
- No Mixing Madness: I swear by this recipe because it’s actually mix-and-bake—no creaming butter and sugar until your arms scream. Just toss in the butter, sugar, corn syrup, and eggs, fold in vanilla, and you’re done. The corn syrup keeps them soft without extra fuss, and honestly? My kids think I’m a baking genius.
- Chewy Yet Crisp: That perfect chew comes from the corn syrup and butter combo—no dry, crumbly cookies here. The edges get just crisp enough to hold their shape, while the center stays tender enough to melt in your mouth. (Yes, even on a Tuesday night.) It’s the kind of cookie that disappears faster than my willpower when the jar’s open.
- Holiday Hacker: Between us, these are my go-to for Christmas cookies because they’re so easy to shape and decorate. Pipe them into trees, stars, or just drop spoonfuls for rustic charm. They freeze like a dream too—bake a batch, stash them, and pull them out whenever you need a sweet fix. (Pro tip: Add sprinkles before baking for extra magic.)
- Pantry Goldmine: I make these with ingredients I already have—no specialty items, no last-minute grocery runs. Butter, sugar, corn syrup? That’s it for the base. The eggs and vanilla are pantry staples too, so it’s a budget win. Plus, they keep for days in an airtight container, so I can bake once and snack for weeks. Minimal effort, maximum reward.
Step-by-step instructions for Jello sugar cookies recipe
Here's how to achieve crispy edges with chewy centers using precise techniques.
Bloom the Gelatin for Maximum Texture Control
Combine the 2 teaspoons unflavored gelatin with the 0.25 cup warm water (about 160°F) in a small bowl. Let it bloom for 5 minutes until the mixture becomes completely translucent and thickens noticeably. This step ensures the gelatin fully activates, which creates those signature shatterproof edges while maintaining a tender interior.
I like to use a fine-mesh strainer to sift the gelatin powder into the warm water—this prevents clumping and guarantees even distribution. Stir gently with a fork just once after blooming to avoid introducing air bubbles that could weaken the cookie structure.
Cream Butter and Sugar for Proper Aeration
In a stand mixer fitted with the paddle attachment, beat the 0.5 cup unsalted butter and 1 cup granulated sugar on medium speed for 3-4 minutes until the mixture is light and fluffy. You'll notice the butter nearly doubles in volume and becomes pale in color—this incorporates air that creates the signature crackly tops.
Don't rush this step. The creaming process is what gives these cookies their signature texture. If you're mixing by hand, use a wooden spoon and work for 5-6 minutes—your arms will thank you later. The mixture should be thick enough to hold peaks when the paddle is lifted.
Incorporate Wet Ingredients for Uniform Texture
Add the 1 whole large egg and 1 tablespoon pure vanilla extract to the butter-sugar mixture. Beat on low speed for 1 minute until fully combined. Then add the bloomed gelatin mixture and mix for another 30 seconds until smooth.
Next, stir in the 0.25 cup light corn syrup and 0.25 cup warm water (if not already used for blooming). The corn syrup adds moisture and chewiness, while the warm water helps dissolve any remaining gelatin particles. Mix until the batter is completely homogeneous—you should see no streaks of flour or gelatin.
Combine Dry Ingredients for Light Structure
In a separate bowl, whisk together the 2.5 cups all-purpose flour, 0.5 teaspoon baking powder, and 0.25 teaspoon salt. Sift the mixture directly into the wet ingredients and mix on low speed for 30-45 seconds until just combined. Overmixing develops gluten, which makes cookies tough rather than chewy.
This is where the magic happens. The gelatin creates a unique texture—cookies that appear crisp but melt in your mouth. If the dough seems too sticky, chill it for 15 minutes before proceeding. The dough should hold together when pressed but still be soft enough to roll.
Bake for Perfect Texture and Finish with Icing
Preheat your oven to 350°F and line baking sheets with parchment paper. Roll the dough into 1-inch balls and place them 2 inches apart on the prepared sheets. Flatten each ball slightly with your palm—this helps them spread evenly and develop crisp edges.
Bake for 10-12 minutes until the edges are light golden brown but the centers still look slightly underdone. They'll continue cooking on the hot pan. Let them cool on the baking sheet for 5 minutes before transferring to a wire rack.
Once cooled, combine the 2 cups powdered sugar, 0.25 teaspoon vanilla icing color (if using), and 0.25 cup heavy cream to make the royal icing. Pipe or drizzle over the cooled cookies for that classic sugar cookie finish. The icing sets quickly, giving you that signature glossy sheen.
Pro Tips For Making Jello Sugar Cookies
- Chill the Dough Properly: After mixing, flatten the dough into a disk and wrap it tightly in plastic—then refrigerate for at least 4 hours (or overnight). I used to skip this, and the cookies spread like pancakes in the oven. Cold dough = cleaner edges and better texture.
- Use Room-Temp Eggs: Crack your eggs straight from the fridge into a bowl first, then let them sit for 10-15 minutes before mixing. Cold eggs add extra moisture to the dough, which can make cookies gummy or tough. Room temp = smoother texture and even baking.
- Don’t Overmix the Dough: Mix the butter, sugar, and corn syrup until light and fluffy—about 2-3 minutes—then fold in the dry ingredients just until combined. Overmixing develops gluten, and these cookies will turn out dense instead of tender. Stop when the flour is just incorporated.
- Add Vanilla Last: Stir the vanilla extract into the dough right before rolling it out. The flavor fades over time, and if you mix it in early, the cookies won’t taste as bright by baking time. A little extra vanilla at the end makes a real difference.
Essential equipment for perfect results
Stand Mixer Essentials
Your KitchenAid Artisan Series stand mixer is the workhorse for these cookies—its powerful motor handles the dense gelatin dough without overheating. I use the paddle attachment for creaming butter and sugar, then switch to the dough hook for final mixing.
The 5-quart bowl provides enough capacity for the full recipe without overfilling, which prevents proper mixing. 💡
For budget-friendly alternatives, the Hamilton Beach 6-Speed mixer works well for smaller batches, though you may need to mix in two stages. Avoid hand mixers—they struggle with the gelatin's density and won't incorporate air properly.
If you don't own a mixer, a handheld immersion blender can help with the wet ingredients, but manual creaming becomes labor-intensive.
Precision Tools for Texture
A digital kitchen scale (like the OXO Good Grips) ensures accurate measurements—gelatin is unforgiving when overmeasured. Weigh your flour and powdered sugar for consistent results.
For the gelatin blooming step, a thermometer (I recommend the Thermoworks Thermapen) verifies your water reaches 160°F—too hot and it cooks the gelatin, too cool and it won't activate fully.
Don't skip the fine-mesh strainer for sifting gelatin powder—it prevents clumps that create uneven texture in your cookies. A spatula with a flexible edge (like the OXO Good Grips silicone version) helps scrape every last bit of dough from your mixing bowl without tearing the gelatin strands.
Baking Sheet Setup
Use half-sheet pans (13x18 inches) lined with parchment paper—they distribute heat evenly and prevent cookies from sticking. I place two pans in the oven at once (top and bottom racks) for even baking.
Avoid dark metal pans—they can over-brown edges before centers set properly. For extra insurance, use light-colored silicone baking mats if you prefer reusable options.
A cookie scoop (like the Wilton 1-inch) ensures uniform dough balls, which bake evenly. For shaping, I use a rolling pin with a textured surface—the OXO Good Grips marble version gives subtle patterns without tearing the dough.
Chill your rolling pin in the freezer for 5 minutes before use if your dough gets too sticky.
Icing Tools for Professional Finish
For the royal icing, a piping bag with a small round tip (like the Wilton 1A) creates clean borders, while a star tip adds decorative flourishes. I use a disposable piping bag with a corner snipped off for freehand drizzling.
A small offset spatula helps spread icing evenly on flat cookies. For color mixing, the Wilton Icing Color Gel sets perfectly without altering texture.
Don't overlook a wire cooling rack—it prevents cookies from sitting in residual heat, which can make them soggy. I place my rack directly on the counter but elevate it with a trivet to allow airflow underneath.
For large batches, a second cooling rack speeds up the process while you ice the first batch.
Nutrition facts
Frequently asked questions
Why do these sugar cookies have a crispy texture?
The secret lies in the gelatin and proper baking technique. The bloomed gelatin creates a delicate network that sets during baking, while the 350°F oven temperature ensures even cooking. The corn syrup also contributes to that satisfying snap while keeping centers tender. Chilling the dough briefly before rolling helps maintain this texture.
Can I make these cookies without gelatin?
You can substitute with agar-agar at double the amount, but the texture won't be identical. Gelatin provides that signature crispy-yet-chewy contrast. For a similar effect, try adding 1 extra egg white to the dough—it helps create structure, though results will differ slightly. The recipe depends on gelatin for its defining characteristic.
How do I prevent my cookies from spreading too much?
Chill the dough for 15-20 minutes before rolling, and flatten the balls slightly with your palm before baking. Using cold butter (not softened) and baking on the middle rack of your oven also helps. If they still spread, reduce baking time by 1 minute—they'll firm up as they cool.
What's the best way to store these cookies?
Keep baked cookies in an airtight container with parchment between layers for up to 3 days at room temperature. For longer storage, freeze dough balls on a tray first, then transfer to a bag for 3 months. The icing hardens as it dries—cover with a damp towel to prevent cracking. Reheat in a 200°F oven for 5 minutes to restore chewiness.
Can I add mix-ins like sprinkles or chocolate chips?
Yes! Fold in 1 cup sprinkles or chocolate chips after mixing the dry ingredients, but don't overdo it—too many mix-ins can prevent proper gelatin activation. For best results, use mini chips or fine sprinkles (like nonpareils) that distribute evenly. Avoid large chunks that could burn before the cookies finish baking.