
Desserts
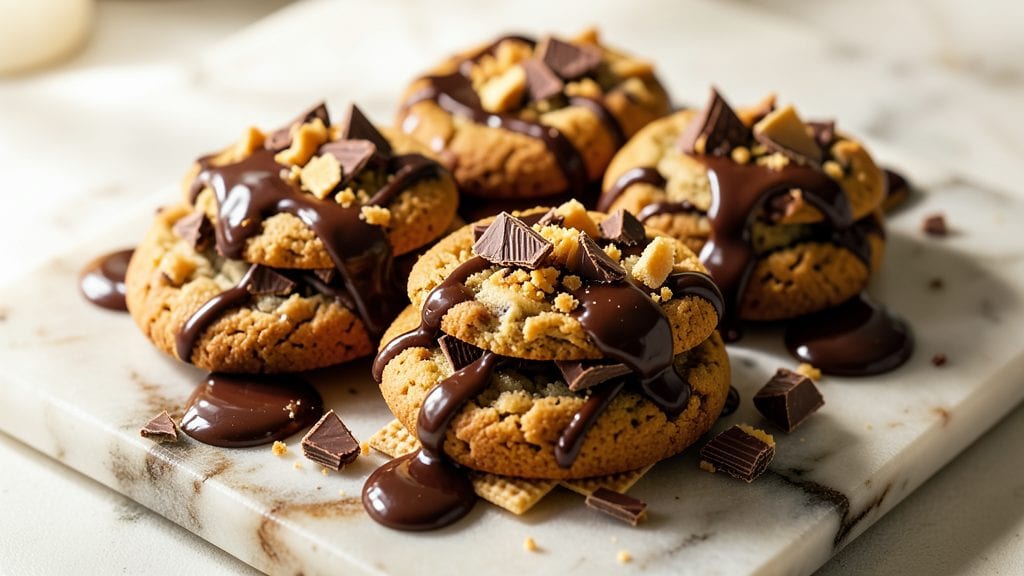
This Kit Kat candy bar cookie recipe delivers the perfect marriage of crispy wafers and gooey chocolate magic in every bite—just like the candy bar itself. The secret? Crushed Kit Kat pieces baked right into the dough for that signature crunch and melty chocolate center that makes these cookies irresistible.
I developed this recipe after years of baking chocolate chip cookies, always craving that extra layer of texture and nostalgia.
The process is straightforward but yields restaurant-quality results—no fancy techniques required. You'll start with a simple dough that includes crushed Kit Kat bars, ensuring each bite delivers that familiar crunch and rich chocolate flavor.
The cookies bake up with crisp edges and a soft, chewy center, while the Kit Kat pieces stay delightfully melty in the middle. This recipe proves you don’t need shortcuts to achieve professional-level dessert.
What makes these cookies truly special is the balance of textures: the crispy wafer-like base, the tender cookie dough, and the melty chocolate from the Kit Kat pieces. The aroma alone will fill your kitchen with warmth, and the taste will have everyone asking for the recipe.
These are the kind of cookies that disappear quickly—perfect for holidays, potlucks, or just satisfying a sweet craving.
Once you try them, you’ll never go back to ordinary chocolate chip cookies. The Kit Kat pieces add a nostalgic twist that elevates the classic recipe to something extraordinary. Let’s get baking!
Ingredients for kit kat candy bar cookie
Six candy bars, one simple dough, and a kitchen filled with Kit Kat magic.
| Ingredient | Amount | Notes |
|---|---|---|
| Kit Kat Candy Bars 🍫 | 6 whole | Crushed into small pieces, wafers included |
| Unsalted Butter 🧈 | 1 cup | Room temperature, full-fat preferred |
| Granulated Sugar 🍚 | ¾ cup | White or light brown sugar |
| Packed Brown Sugar 🍚 | ¾ cup | For chewy texture |
| Large Eggs 🥚 | 2 whole | Room temperature, beaten |
| Vanilla Extract 🌿 | 1 tsp | Pure vanilla preferred |
| All-Purpose Flour 🌾 | 2 cups | Sifted for light texture |
| Baking Soda 🧂 | ½ tsp | For lift and crisp edges |
| Salt 🧂 | ½ tsp | Fine sea salt |
| Semisweet Chocolate Chips 🍫 | 1 cup | For extra chocolate flavor |
| Milk Chocolate Chips 🍫 | ½ cup | For contrast to Kit Kat |
| Granulated Sugar 🍚 | ¼ cup | For sprinkling on top |
The Kit Kat bars are the star here—Hershey's or Nestlé both work, but the wafer texture makes all the difference. Grab the full-size bars (not the mini ones) for the best crunch. Crush them by hand in a bag—no food processor needed, just smash them up until you have a mix of wafer pieces and chocolate chunks. I always buy a few extra bars because these disappear fast. The chocolate chips add another layer of richness, so don’t skip them. For the butter, Land O’Lakes or Plugrá are my go-tos—room temperature is key for mixing.
No Kit Kat bars? Crushed Oreos or Ritz crackers can mimic the crunch, but nothing beats the real deal. Short on chocolate chips? Melted chocolate bars chilled into chunks work too. The vanilla extract can be swapped for vanilla bean paste if you're feeling fancy. For the sugar, Turbinado sugar on top adds a nice crunchy texture. If you're baking at high altitudes, add an extra 1/4 cup flour to the dough. And trust me, the extra chocolate chips in the dough are worth the effort—every bite feels like a hug.
These cookies keep for about 5 days in an airtight container, but they’ll likely be gone before then. For longer storage, freeze the dough balls and bake straight from frozen (add 1-2 minutes). The Kit Kat pieces stay melty for about 3 days if stored properly, so make a fresh batch if you’re saving them longer. I always double the recipe—they’re that good. The aroma alone will have your whole house asking what’s baking.
Why You'll Love This Recipe
- Here’s what sold me: the texture. Soft, buttery cookie base with those Kit Kat chunks melting just enough to stick to your fingers—then crunch when you bite. Honestly, I’ve made cookies with every chocolate bar imaginable, but this combo? It’s the only one where I’ll sneak bites straight from the dough.
- I’ll be real: store-bought Kit Kat cookies cost $4 for six. This recipe makes twenty-four for under $8 using store-brand butter and bulk sugars. Plus, leftovers? They last a week if you’re disciplined (I’m not), or freeze perfectly for when your kid “forgets” their snack. Win.
Step-by-step instructions for Kit Kat candy bar cookies
Here's how to make these irresistible cookies with crispy Kit Kat wafers and gooey chocolate pockets.
Crush the Kit Kat Candy Bars
Break each of the 6 whole Kit Kat candy bars into small pieces, including the wafers. I like to use my hands for this—it's faster and gives you more control. You want chunks ranging from tiny crumbs to small wafer pieces. If you're feeling fancy, you can even chop the chocolate bars separately from the wafers for extra texture contrast.
Once crushed, set the pieces aside. We'll add them to the dough later, but they need to stay separate until then. This keeps the wafers from getting soggy before baking. Trust me, that crispy wafer texture is what makes these cookies special.
Cream the Butter and Sugars
In a large mixing bowl, combine the 1 cup unsalted butter, 0.75 cup granulated sugar, and 0.75 cup packed brown sugar. Using a hand mixer or stand mixer, beat on medium speed for about 3 minutes until light and fluffy. You'll see the mixture nearly double in volume and become pale in color.
This creaming process is crucial—it incorporates air into the dough, which creates those beautiful crackly tops and helps the cookies spread just right. If your butter isn't quite room temperature, let it sit at room temperature for another 10-15 minutes until it's soft but not melted.
Mix in Eggs, Vanilla, and Dry Ingredients
Add the 2 whole large eggs, one at a time, mixing well after each addition. Then stir in the 1 teaspoon vanilla extract. In a separate bowl, whisk together the 2 cups all-purpose flour, 0.5 teaspoon baking soda, and 0.5 teaspoon salt. Gradually add the dry ingredients to the wet mixture, mixing just until combined.
Don't overmix here—you're looking for a dough that comes together but still has some texture. Fold in the 1 cup semisweet chocolate chips and 0.5 cup milk chocolate chips, then gently stir in the crushed Kit Kat pieces. The dough will be thick and sticky, but that's exactly what we want for these rich cookies.
Chill and Prepare for Baking
Cover the dough with plastic wrap and refrigerate for at least 30 minutes, or up to 24 hours if you're planning ahead. This chilling step is crucial—it helps the cookies maintain their shape when they hit the oven and prevents excessive spreading. The longer you chill, the thicker your cookies will be.
While the dough chills, preheat your oven to 350°F and line two baking sheets with parchment paper. I like to use a cookie scoop for even-sized cookies, but you can also use a tablespoon measure if you prefer. Remember, these cookies are rich, so don't overbake them—we want that gooey center.
Bake to Golden Perfection
Drop rounded tablespoon-sized portions of dough onto the prepared baking sheets, spacing them about 2 inches apart. Sprinkle each cookie with a pinch of the 0.25 cup granulated sugar on top—this gives them that beautiful caramelized crust. Bake for 10-12 minutes, or until the edges are golden brown but the centers still look slightly underdone.
The cookies will continue cooking on the hot baking sheet after you remove them from the oven, so don't overbake. Let them cool on the baking sheet for 5 minutes before transferring to a wire rack. Serve warm for the ultimate experience—you'll get that perfect balance of crispy Kit Kat wafers and melty chocolate pockets in every bite.
Pro Tips For Making Kit Kat Candy Bar Cookie
- CHOP KIT KATS SMALL: Use a sharp knife or pulse in a food processor—tiny pieces (about ¼-inch) melt evenly and create pockets of gooey chocolate, not clumps. I learned this the hard way after pulling out a cookie with a single, sad, unmelted Kit Kat wafer.
- CREAM BUTTER COLD: Pull the butter straight from the fridge and let it sit for 10 minutes before creaming—it should be soft but not greasy. This prevents a greasy dough that spreads like a pancake instead of holding its shape.
- UNDERBAKE SLIGHTLY: Pull cookies out when edges are set but centers still look soft—overbaking turns them dry and crumbly. They’ll firm up as they cool, and the Kit Kat pieces will stay chewy, not rubbery.
- SWAP MINI KIT KATS: Use mini Kit Kat bars instead of full-size for faster baking and more even distribution. They’re cheaper, melt cleaner, and you’ll end up with a tray of perfectly studded cookies instead of a few overloaded ones.
Storing and reheating this recipe
Refrigerator Storage
Store your freshly baked Kit Kat cookies in an airtight container with parchment paper between layers to maintain crispness. They’ll stay fresh for up to 5 days at room temperature, but I find they’re best enjoyed within 2-3 days when the Kit Kat pieces are still melty.
For extra protection, place a slice of bread in the container to absorb moisture—this trick keeps them crispy longer. 🍪
Freezer Storage
For longer storage, freeze unbaked dough balls wrapped individually in plastic wrap, then transfer to a freezer bag for up to 3 months. Bake straight from frozen, adding 1-2 extra minutes to the baking time.
If you’ve already baked them, freeze cookies on a tray first (to prevent sticking), then transfer to a bag. Thaw at room temperature for 10 minutes before serving—this restores that perfect melty texture. ❄️
Reheating Crispy Cookies
Revive slightly stale cookies by placing them on a baking sheet and baking at 300°F for 3-5 minutes. For a quick fix, microwave for 10 seconds—just enough to warm the chocolate without turning it grainy.
I avoid the microwave for most cookies, but this works in a pinch. The key is speed: reheat only what you plan to eat immediately to preserve that crispy wafer crunch. 🔥
Reviving Melty Centers
If the Kit Kat pieces in your cookies have hardened, the fix is simple: place the cookies on a baking sheet and warm in a 250°F oven for 2-3 minutes. The gentle heat will melt the chocolate back into its gooey glory.
For even better results, sprinkle a few drops of water on top before reheating—the steam helps restore that perfect melt-in-your-mouth texture. 💫
Portioning for Parties
When serving at gatherings, portion cookies into clear plastic containers with parchment-lined compartments. Store in the fridge for up to 3 days to keep the chocolate from melting in warm rooms. Label with the date—trust me, these disappear fast!
For a festive touch, arrange them on a tiered stand with white chocolate drizzle. The contrast of crispy wafers and melty chocolate makes them irresistible. 💛
Make-Ahead Dough
Prepare the dough up to 24 hours ahead and refrigerate it for easier baking later. Portion the chilled dough into 1-tablespoon balls and freeze them on a tray before transferring to a bag.
When ready to bake, simply add 1-2 minutes to the baking time. This method saves time and ensures you’re always ready for last-minute cravings or unexpected guests. 📅
Nutrition facts
Frequently asked questions
Can I use mini Kit Kat bars instead of full-size?
The recipe calls for full-size bars to ensure enough wafer texture and chocolate chunks. Mini bars would give you too many tiny pieces, and you'd need 12-15 mini bars to match the quantity. If you only have mini bars, crush them all and use the same amount by weight (6 oz total), but expect smaller cookies with less dramatic texture contrast.
Why do my cookies spread too much?
Overmixing the dough or skipping the 30-minute chill are the most common causes. The butter needs time to firm up slightly before baking. For thicker cookies, chill the dough 4+ hours or use a cookie scoop. Also, make sure your oven is properly calibrated—350°F is critical. If your oven runs hot, reduce to 325°F and check at 10 minutes.
How can I make these cookies vegan?
Replace the butter with vegan butter (like Miyoko's), use flax eggs (2 tbsp ground flaxseed + 6 tbsp water per egg), and swap honey for agave. For chocolate, use dairy-free chips or chopped vegan chocolate bars. The texture will be slightly denser but still delicious. The Kit Kat wafers themselves aren't vegan, so you'd need to substitute with crushed vegan wafers or extra chocolate chunks.
Can I add other mix-ins besides chocolate chips?
Try toasted nuts (pecans or walnuts), dried fruit (chopped apricots or cranberries), or even white chocolate chunks for extra decadence. For best results, keep additional mix-ins to ½ cup total to maintain the Kit Kat's star status. If adding nuts, toast them first to enhance flavor—just 5 minutes at 350°F until fragrant.
What's the secret to keeping the Kit Kat pieces melty?
The key is underbaking slightly and storing properly. Pull cookies when edges are golden but centers still look soft (10-11 minutes at 350°F). Let them cool on the baking sheet for 5 minutes before transferring. For storage, keep in an airtight container at room temperature for 2-3 days max—the chocolate starts hardening after that. Reheat briefly at 250°F for 2 minutes to restore meltiness.