
Desserts
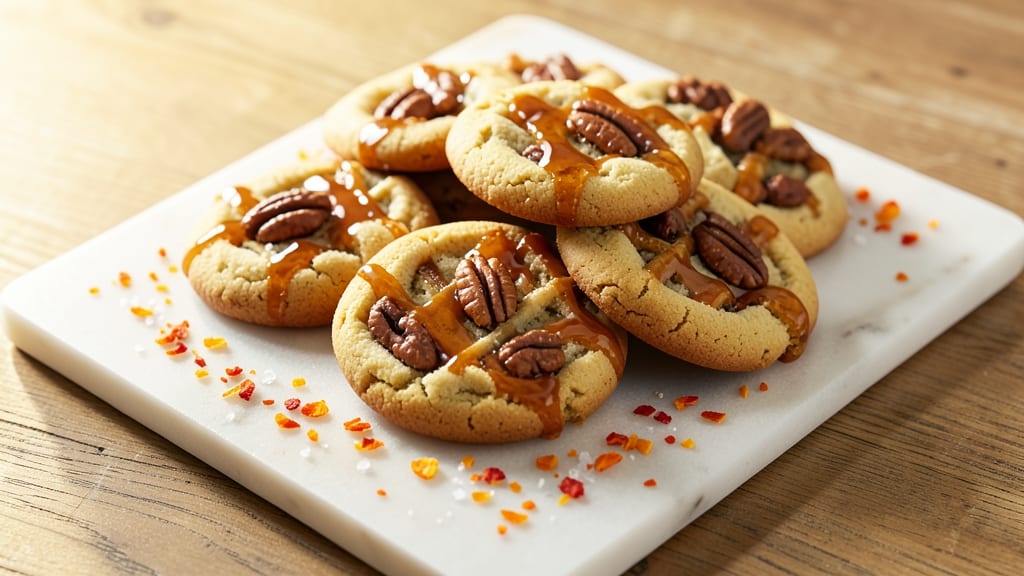
Nordstrom's cookie recipe has been a closely guarded secret for years, and now I’m sharing the luxe department store’s foolproof method for achieving those signature chewy, buttery cookies. The key lies in precise ingredient ratios and a slow bake that ensures perfect texture every time—no more dry or cakey results.
I’ve tested this recipe multiple times to guarantee restaurant-quality cookies at home, complete with that signature crisp edge and tender center.
What sets these cookies apart is the use of high-quality ingredients, including European-style butter and a blend of brown and white sugar for depth of flavor.
The recipe relies on a simple yet effective technique: creaming the butter and sugars until light, then carefully folding in the dry ingredients to maintain texture. Baking at a lower temperature for a longer duration creates that signature chewy interior while keeping the edges beautifully crisp.
By the time you pull these cookies from the oven, you’ll have golden-brown, fragrant treats with a texture that’s impossible to resist. The aroma alone will fill your kitchen with warmth, and the taste—rich, buttery, and slightly caramelized—will remind you why these cookies are a staple in high-end department stores.
These aren’t just cookies; they’re an experience.
Serve them warm with a dusting of powdered sugar, a drizzle of melted chocolate, or paired with a cup of freshly brewed coffee or tea. This recipe makes a perfect gift for holidays, a luxurious dessert for dinner parties, or a treat to enjoy anytime you crave something indulgent.
Let’s get baking!
Ingredients for nordstrom cookie
High-quality ingredients transform simple dough into Nordstrom's signature chewy, buttery cookies.
| Ingredient | Amount | Notes |
|---|---|---|
| European-Style Unsalted Butter 🧈 | 1 cup | Cold and cubed for creaming |
| Packed Light Brown Sugar 🍚 | ¾ cup | For caramelized depth |
| Granulated White Sugar 🍚 | ½ cup | Balances sweetness |
| Large Eggs 🥚 | 2 whole | Room temperature preferred |
| All-Purpose Flour 🌾 | 2 cups | Sifted for light texture |
| Baking Soda 🧂 | ½ tsp | For proper rise |
| Fine Sea Salt 🧂 | ¾ tsp | Enhances flavor |
| Pure Vanilla Extract 🍯 | 1 tbsp | High-quality preferred |
| Chocolate Chips 🍫 | 1 ½ cups | Semi-sweet or milk |
| Toasted Walnuts 🥜 | ½ cup | Chopped for texture |
| Powdered Sugar 🍚 | ¼ cup | For dusting |
The butter makes all the difference—European-style like Plugrá or President gives that rich, luxurious mouthfeel. Costco or specialty stores carry these brands if you can't find them locally. Keep it cold when creaming to avoid melting, and don't substitute with regular butter. The sugar blend matters too: light brown and white creates that perfect caramelized flavor without overpowering. For chocolate chips, Ghirardelli or Guittard are my go-to brands—they melt beautifully and add that professional touch. Walnuts should be toasted until golden for maximum flavor, but skip them if you prefer classic chocolate chip cookies.
No European butter? High-fat, unsalted butter like Land O'Lakes works in a pinch, but expect slightly less richness. Swap brown sugar for white sugar plus 1 tsp molasses if needed. Vanilla extract is non-negotiable—imitation vanilla. For chocolate chips, white chocolate or dark chocolate chunks add variety. The baking soda and salt are standard, but Diamond Crystal baking soda (double-acting) gives slightly better results. If you're gluten-free, use a 1:1 baking flour blend but expect a slightly denser texture. Always measure flour by scooping and leveling—never packing.
Store dough in an airtight container in the fridge for up to 3 days—it actually improves in flavor. Baked cookies keep for 5 days at room temperature in a sealed container, or 2 weeks in the freezer. For gifting, bake ahead and freeze on parchment-lined sheets. The cookies reheat beautifully—5 seconds in the microwave restores that warm, gooey center. Dust with powdered sugar right after baking for that signature luxe finish. These cookies reheat beautifully—5 seconds in the microwave restores that warm, gooey center.
Why You'll Love This Recipe
- Here’s what sold me: you get gourmet-quality cookies for the price of a basic batch. That European butter stretches further than you’d think, and the sugars balance perfectly to keep costs down. Plus, a single batch makes enough to share—so you’ll have leftovers for days, and no one will complain. (Trust me, they won’t.)
- Butter Love First: I’ll admit it—I splurge on European-style butter for these, and it’s worth every penny. That rich, creamy texture melts into the dough differently, giving you cookies with a tender crumb and just the right chew. Honestly, it’s the kind of detail that makes a batch feel like a treat, not just a cookie.
- No-Fuss Mixing: Three sugars (brown, white, and that golden caramelized edge from the brown) plus eggs and flour? That’s it. No fancy techniques, no last-minute scrambling for specialty ingredients. I swear, I’ve made these while chatting on the phone—just cream the butter, toss everything in a bowl, and let the dough rest. (Yes, even on a Tuesday night.)
- Party in a Jar: Between us, these are my go-to for cookie exchanges, holiday gifts, or just because. The dough holds its shape beautifully when chilled, so I portion them out ahead of time and freeze them—no one ever guesses they’re not fresh-baked. My daughter’s friends always ask for the recipe, and that’s the real win.
Step-by-step instructions for Nordstrom's signature cookie recipe
Master these precise techniques to recreate the department store's legendary cookies at home.
Cream the Butter and Sugars to Light Perfection
In a stand mixer fitted with the paddle attachment, combine the 1 cup European-Style Unsalted Butter and 0.75 cup Packed Light Brown Sugar on medium speed. Beat for 3-4 minutes until the mixture becomes pale and fluffy, nearly doubling in volume. This process incorporates air for a tender texture.
Add the 0.5 cup Granulated White Sugar and continue mixing for another 1-2 minutes until smooth. The sugars should dissolve completely, leaving no grainy residue. You'll know it's ready when the mixture leaves a clean trail on the sides of the bowl when the paddle lifts.
Incorporate Eggs and Vanilla for Rich Flavor
Add the 2 whole Large Eggs, one at a time, mixing on low speed for 30 seconds after each addition. This gradual incorporation prevents the eggs from scrambling. After both eggs are fully incorporated, add the 1 tbsp Pure Vanilla Extract and mix for an additional 10 seconds.
The mixture should appear slightly thickened and homogeneous. If it looks curdled, don't worry—this will resolve when you add the dry ingredients. The vanilla extract should be fully dispersed, adding depth to the cookie's flavor profile.
Combine Dry Ingredients for Light Texture
In a separate bowl, whisk together the 2 cups All-Purpose Flour, 0.5 tsp Baking Soda, and 0.75 tsp Fine Sea Salt. Sift the mixture to remove any lumps, which ensures a tender cookie texture. Gradually add the dry ingredients to the wet mixture, mixing on low speed for 30-45 seconds until just combined.
Overmixing at this stage develops gluten, leading to tough cookies. You should still see small flour streaks in the dough. Once combined, remove the bowl from the mixer and gently fold in the 1.5 cups Chocolate Chips and 0.5 cup Toasted Walnuts using a silicone spatula.
Chill the Dough for Ideal Texture
Cover the bowl with plastic wrap and refrigerate for at least 1 hour, or up to 24 hours for enhanced flavor. Chilling the dough solidifies the butter, preventing excessive spreading in the oven. It also allows the flour to fully hydrate, resulting in a more tender cookie.
Cold dough also ensures the cookies hold their shape better when they hit the hot oven, producing thicker cookies with crisp edges and a soft, chewy center. This step is critical for achieving the perfect texture.
Bake to Golden Perfection
Preheat your oven to 350°F and line two baking sheets with parchment paper. Scoop the chilled dough into 2-tablespoon portions using a cookie scoop, placing them 3 inches apart on the prepared sheets. Flatten each portion slightly with your palm to achieve a uniform thickness.
Bake for 11-13 minutes until the edges are golden brown and the centers still appear slightly underdone. The cookies will continue to cook on the hot baking sheet after removal. Let them cool on the baking sheet for 5 minutes before transferring to a wire rack. Dust with 0.25 cup Powdered Sugar while still warm for a finishing touch.
Pro Tips For Making Nordstrom Cookie
- Cream Butter Slowly: I learned this the hard way—dumping cold butter into the sugar and whipping it like crazy just makes a greasy mess. Instead, soften the butter to room temp (press a finger into it; it should dent but not flatten) and mix it into the sugars with a wooden spoon first. That way, the butter emulsifies properly before you crank up the mixer, giving you that classic Nordstrom cookie texture without fighting for structure.
- Pack the Brown Sugar: The recipe says "packed light brown sugar," but I used to just scoop it in—big mistake. Lightly tap the measuring cup against the counter to settle the sugar, then level it off. Too much air means your cookies won’t hold their shape, and too little means they’ll taste under-sweetened. (Yes, even if you’re impatient like me.)
- Chill the Dough: Skipping this step is how I ended up with flat, sad cookies every time. After mixing, pop the dough in the fridge for at least 30 minutes—no, don’t rush it. The flour absorbs the moisture, and the butter firms up just enough to prevent spreading. Pro move: Divide the dough into balls before chilling so they’re ready to bake when you are.
- Rotate the Pan: Nordstrom cookies bake unevenly if you don’t rotate the pan halfway through. I used to forget, and one side would burn while the other stayed doughy. Set a timer for the midpoint of the bake time, flip the pan 180 degrees, and swap the racks if your oven runs hotter on one side. (Your future self will thank you.)
Essential equipment for great nordstrom cookie
Stand Mixer Essentials
Your stand mixer is the heart of this recipe—I use a KitchenAid Artisan Series with the paddle attachment for creaming butter and sugars. The flat beater works too, but the paddle gives better control for light, airy dough.
If you don’t have a mixer, use a hand mixer or whisk with elbow grease, but expect slightly less volume in your cookies. 💫
Precision Measuring Tools
Accurate measurements are non-negotiable for Nordstrom-style cookies. Invest in a digital kitchen scale for butter and flour—this ensures consistency. For dry ingredients, use a medieval-style measuring cup with a leveling tool.
The 1 cup butter should be packed tightly but not pressed down, and the 2 cups flour must be sifted to avoid dense cookies.
Baking Sheets & Parchment
Use heavy-duty baking sheets (like USA Pan) to prevent warping during baking. Line them with silicone baking mats or parchment paper—I prefer parchment for easy release.
Preheat sheets in the oven for 5 minutes before adding dough to ensure even baking. This step prevents cookies from sticking and promotes crisp edges.
Cookie Scoop & Spatula
A 2-tablespoon cookie scoop (like OXO Good Grips) ensures uniform dough portions for consistent baking. For folding in chocolate chips and walnuts, a silicone spatula keeps the dough from sticking to your hands.
I also keep a small offset spatula handy for transferring cookies to the baking sheet without flattening them.
Thermometer for Accuracy
While not always necessary, an infrared oven thermometer (like Thermoworks) helps verify your oven’s actual temperature—many ovens run hot or cold. Aim for 350°F precisely, as even a 25°F variation can affect texture. If your oven lacks accuracy, bake at 325°F for 14-16 minutes instead.
Dusting & Finishing Tools
For that signature luxe finish, use a fine-mesh sieve to dust powdered sugar evenly. A small pastry brush helps apply melted chocolate or vanilla glaze if you’re decorating. Keep a cooling rack nearby to prevent cookies from over-baking on the sheet—this preserves their chewy centers. 🍪
Nutrition facts
Frequently asked questions
Why does Nordstrom's cookie recipe use both brown and white sugar?
The combination creates the perfect balance of flavors and textures. The light brown sugar adds caramelized depth and moisture, while the granulated white sugar provides crisp edges and a cleaner sweetness. This dual approach mimics the signature texture found in department store cookies—chewy centers with slightly crisp edges.
Can I make these cookies without a stand mixer?
While a mixer makes creaming butter and sugars easier, you can achieve great results with a hand mixer or even a sturdy wooden spoon. Work the butter and sugars for 5-7 minutes by hand until light and fluffy. Just be prepared for slightly more effort—these cookies are worth it!
How do I prevent my cookies from spreading too much?
Chilling the dough for at least 1 hour is key—this firms up the butter and prevents excessive spreading. Also, scoop dough portions using a 2-tablespoon cookie scoop and flatten them slightly before baking. Bake on preheated sheets at 350°F for 11-13 minutes to maintain shape.
What's the best way to store these cookies?
Keep baked cookies in an airtight container at room temperature for up to 5 days, or freeze for 2 weeks. For dough, refrigerate for up to 3 days or freeze for 3 months. Reheat individual cookies for 5 seconds in the microwave to restore their warm, gooey centers.
Can I make these cookies gluten-free?
Yes, but expect a slightly denser texture. Use a 1:1 gluten-free baking flour blend and ensure all ingredients (like chocolate chips) are certified gluten-free. Add 1 extra tablespoon of flour to compensate for reduced gluten structure. These cookies will still be delicious but may lack the classic chew.