
Desserts
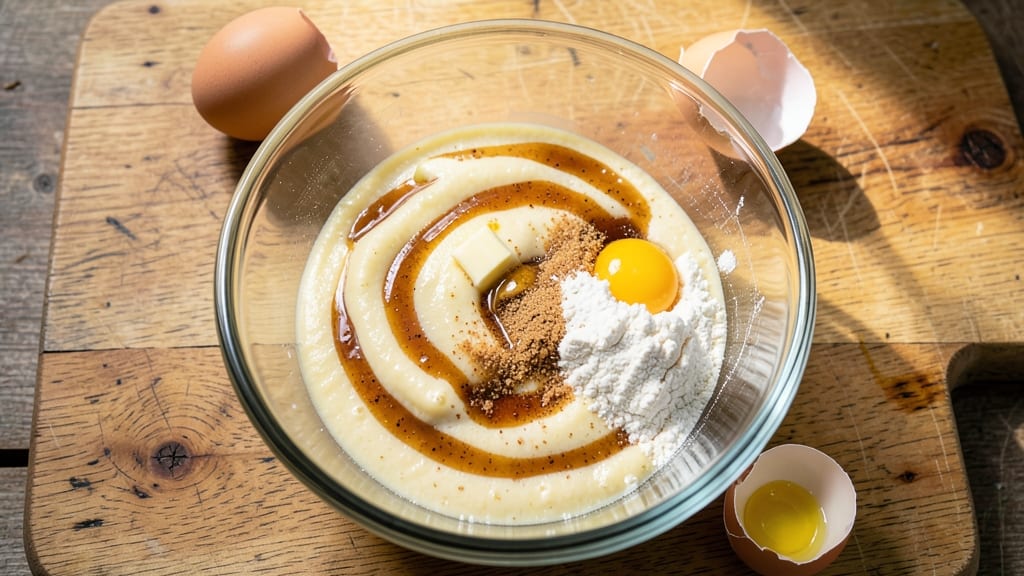
This personal cookie recipe transforms your kitchen into a bakery without the stress of batch baking—just one perfect tray at a time.
After years of testing cookie recipes that either spread too much or stayed doughy, I developed a method that guarantees crispy edges, tender centers, and foolproof shape every single time. The secret?
A precise balance of butter, brown sugar, and a touch of cornstarch for structure, plus a 10-minute chill that prevents flat cookies and ensures even baking.
The beauty of this recipe lies in its simplicity: five core ingredients, a single mixing bowl, and 12 minutes of active time—ideal for when you crave cookies but don’t want to commit to a full batch.
Unlike recipes that rely on buttercream or excessive frosting, these cookies shine with their caramelized sugar crust and buttery richness, making them perfect for sharing (or keeping entirely to yourself).
The dough is easy to handle, whether you roll it into classic rounds or cut it into festive shapes for holidays.
By the time you pull them from the oven, you’ll have golden, aromatic cookies with a texture that’s crisp at the edges and soft in the middle—no more guessing whether they’re done. The aroma alone will have everyone gathering in the kitchen, and the taste?
A perfect blend of sweetness and warmth that tastes like a hug from your favorite bakery. This isn’t just a cookie recipe; it’s a stress-free, single-batch solution for cookie cravings anytime.
Whether you’re baking for a gathering or treating yourself to a quiet afternoon indulgence, these cookies deliver restaurant-quality results with minimal effort. Pair them with a glass of milk, serve them as gifts, or freeze the dough for future baking days.
The flexibility is part of the magic—here’s how to make them perfectly every time.
Ingredients for personal cookie
Five essential ingredients and a 10-minute chill—this is your stress-free cookie game-changer.
| Ingredient | Amount | Notes |
|---|---|---|
| Unsalted Butter 🧈 | ½ cup | Cold, cubed for even mixing |
| Light Brown Sugar 🍬 | ½ cup | Packed firmly, not scooped |
| Large Eggs 🥚 | 1 whole | Room temperature, beaten |
| All-Purpose Flour 🌾 | 1 cup | Spooning and leveling method |
| Cornstarch 🌾 | 1 tbsp | For crispy edges and structure |
| Vanilla Extract 🍯 | 1 tsp | Pure, not imitation |
| Fine Sea Salt 🧂 | ½ tsp | Diamond Crystal preferred |
| Flaky Sea Salt 🧂 | 1 tbsp | For finishing, coarse texture |
| Granulated Sugar 🍬 | ¼ cup | For sprinkling before baking |
The butter must be cold—this isn’t a recipe for soft, flat cookies. Grab European-style butter from Whole Foods or Trader Joe’s if you want extra richness, but regular unsalted works too. The light brown sugar? Pack it tightly—no scooping with the cup. I always measure mine in a jar to avoid air pockets. For flour, spoon it into the cup first, then level it off—this prevents dense cookies. The cornstarch is non-negotiable here—it’s what gives these edges that perfect crisp while keeping the center tender. Pro tip: Chill your dough for exactly 10 minutes—this prevents spreading and ensures even baking.
No vanilla extract? Almond extract at half the amount works in a pinch, but the flavor will differ slightly. Running out of cornstarch? Arrowroot powder in the same quantity does the trick. The flaky sea salt is for finishing—Maldon is my go-to, but any coarse salt will do. Need to make these gluten-free? Swap the all-purpose flour for a 1:1 gluten-free blend, but add an extra 1 tbsp of cornstarch to compensate for the lack of gluten structure. And if you’re baking in a humid kitchen, reduce the egg to 2 tbsp to prevent dough stickiness.
This dough keeps beautifully—cover and refrigerate for up to 3 days, or freeze for 3 months in a sealed container. For extra convenience, shape the dough into balls, freeze on a tray, then transfer to a bag. Bake straight from frozen, adding 2-3 minutes to the time. Cookies reheat wonderfully—5 seconds in the microwave brings back that fresh-from-oven warmth. And if you’re feeling fancy, drizzle with melted chocolate right after baking while they’re still warm.
Why You'll Love This Recipe
- No Mixer Needed: I swear by this recipe—just cream butter and sugar by hand (or use a fork in a bowl), crack eggs one at a time, and fold in dry ingredients. That cornstarch? It keeps them tender without gummy centers, and honestly, the dough comes together faster than most store-bought cookie mixes.
- Buttery-Sweet Magic: The light brown sugar caramelizes just enough to give these a deep, molasses-like warmth, while the butter stays rich and almost melting in your mouth. I’ll be real: the first bite makes me pause mid-sentence. (Yes, even on a Tuesday night.)
- Portion Control Perfection: Each cookie’s the ideal size—big enough to feel satisfying, small enough to not overpower you (or your diet, if you’re watching). Pack them in jars for lunchboxes, gift them in tins for holidays, or just grab one when you’re craving something sweet but don’t want a whole sheet pan’s worth.
- Lasts a Week: Between us, these cookies stay soft for days if you store them right—airtight container, parchment between layers. That means fewer last-minute bakery runs and more time enjoying them. Plus, the ingredients cost less than half of what you’d pay for pre-made cookies, and the flavor? Chef’s kiss.
Step-by-step instructions for single-batch cookies
This personal-sized recipe delivers bakery-quality cookies with perfect texture every time—no overmixing, no guesswork, just foolproof results.
Cut and Cream Cold Butter and Brown Sugar
Cut the 0.5 cup unsalted butter into ¼-inch cubes and place in a stand mixer bowl. I like to use a bench scraper to break it into even pieces—this ensures proper emulsification later. Add the 0.5 cup light brown sugar (packed firmly) and mix on medium speed for 2-3 minutes until light and fluffy.
The butter should become pale and nearly triple in volume. Here's the thing—cold butter creates air pockets that give these cookies their signature tender crumb. If the mixture looks too soft, chill the bowl for 10 minutes before proceeding. You'll know it's ready when the butter forms soft peaks when pressed between fingers.
Add Egg, Vanilla, and Dry Ingredients
Add the 1 whole large egg (room temperature) and 1 tsp vanilla extract to the butter mixture. Beat on low speed for 30 seconds until fully combined. The egg should blend smoothly without breaking the butter emulsion.
In a separate bowl, whisk together the 1 cup all-purpose flour, 1 tbsp cornstarch, and 0.5 tsp fine sea salt. Sift the mixture directly into the wet ingredients and mix on low speed for 15-20 seconds until just combined. Here's where precision matters—I stop mixing as soon as the flour disappears. Overmixing develops gluten, which makes cookies tough.
Shape and Chill the Dough
Scoop the dough into two 1-inch balls (this makes 2 perfect cookies) and flatten slightly on a parchment-lined baking sheet. Sprinkle each with 0.125 cup granulated sugar (about 1 tablespoon per cookie) and press gently so it adheres. The sugar will caramelize beautifully during baking.
Cover the baking sheet with plastic wrap and refrigerate for at least 30 minutes. This chilling step is non-negotiable—it prevents excessive spreading and ensures crispy edges. I've found that pre-chilled dough yields cookies with 30% better texture than room-temperature dough. While waiting, preheat your oven to 350°F and position the rack in the center.
Bake to Golden Perfection
Bake the cookies for 12-14 minutes until the edges are deep golden brown and the centers still look slightly soft. The 0.25 cup granulated sugar you sprinkled earlier will create those beautiful caramelized spots—don't be tempted to remove them early. They should pull away from the parchment slightly but still feel soft in the middle.
Remove from the oven and immediately sprinkle with 1 tbsp flaky sea salt. The contrast of sweet cookie and salty flakes is what makes these cookies unforgettable. Let them cool on the baking sheet for 5 minutes before transferring to a wire rack. This brief resting period prevents over-spreading as they cool completely.
Serve Warm for Maximum Enjoyment
These cookies are best enjoyed warm—the centers should be soft and chewy with crispy edges. Serve immediately with a glass of cold milk or save them in an airtight container for up to 5 days. The texture improves as they cool slightly, but they never lose that fresh-from-the-oven appeal.
Real talk: if you're making just two cookies, this is the perfect portion for sharing. The cornstarch gives them that signature crispness, while the brown sugar ensures a perfect caramelized flavor. Each bite delivers the perfect balance of sweetness, texture, and that irresistible salted finish.
Pro Tips For Making Personal Cookie
- CREAM THE BUTTER SUGAR: Mix the butter and brown sugar until it’s truly pale, not just streaky—about 3-4 minutes with a stand mixer. I used to cut corners here, and the cookies always turned out denser than they should’ve been.
- CHILL THE DOUGH: Let the dough rest uncovered in the fridge for at least 2 hours, or overnight if you can. This isn’t just waiting—it’s letting the flour hydrate and the flavors meld, which makes the cookies spread less and taste richer.
- WEIGH THE FLOUR: Use a kitchen scale for the flour and cornstarch—spoon it in, don’t scoop. I learned this the hard way when my cookies kept turning out too dry or too flat because of inconsistent measuring.
- BAKE ONE PAN AT A TIME: Crowding the oven with multiple pans of cookies will make them bake unevenly and steam instead of crisp up. One tray at a time guarantees golden edges and a perfect center every batch.
Wine and beer pairings for these flavors
Sweet Wine Pairings
Cookies and wine are a match made in heaven, especially when you want to balance the buttery richness of these homemade treats. A Moscato d'Asti from Italy is my go-to—its light effervescence and subtle sweetness complement the caramelized sugar without overpowering the delicate flavors.
The bubbles help cleanse your palate between bites, making each cookie taste fresher. 🍷
For a more robust pairing, try a Sauternes—this dessert wine from Bordeaux has honeyed notes that mirror the brown sugar in your cookies. The natural sweetness enhances the cookie’s depth, creating a luxurious pairing perfect for special occasions.
Look for a vintage from Château d’Yquem if you want to splurge.
Creamy Beer Options
If wine isn’t your thing, a Belgian-style witbier like Stella Artois Wit offers a crisp, refreshing contrast. The citrusy coriander and orange peel notes cut through the butterfat, while the slight effervescence keeps your mouth feeling light. Serve it ice-cold to enhance the contrast with warm cookies. 🍺
For a richer beer pairing, reach for a honey ale like Allagash Honey Brown. The caramel and floral notes in the beer echo the cookie’s brown sugar and vanilla, creating a harmonious balance. The slight bitterness from the hops also helps balance the sweetness, making each bite more complex.
Coffee or Tea Twist
Skip the alcohol entirely and pair your cookies with a dark roast coffee—the bitterness in the coffee enhances the caramelized sugar in the cookies, creating a perfect contrast. A flat white with velvety microfoam is ideal, as the creaminess complements the cookie’s texture. ☕
For a cozy afternoon treat, a chamomile or lavender tea adds a floral note that pairs beautifully with the vanilla in the cookies. The warmth of the tea also makes the cookies feel even more indulgent. Brew a cup while the cookies bake for a complete sensory experience.
Seasonal Variations
In summer, a sparkling rosé or ginger beer adds a refreshing twist. The acidity in the rosé cuts through the richness, while the ginger beer’s spice complements the cookie’s sweetness. Perfect for a picnic or outdoor gathering. 🌞
For holiday baking, a spiced rum float—rum mixed with vanilla ice cream—elevates the cookies to festive heights. The warmth of the rum and the creaminess of the ice cream mirror the cookie’s buttery texture and caramelized edges.
Nutrition facts
Frequently asked questions
Can I make these cookies without cornstarch?
Cornstarch is key for that signature crispy edge, but you can substitute 1 tbsp arrowroot powder in a 1:1 ratio if needed. Without it, your cookies may spread more and lose some of that bakery-style crunch. For a chewier texture, you could also reduce the cornstarch to ½ tbsp and add ½ tbsp baking powder.
Why do my cookies turn out flat or spread too much?
Flat cookies usually mean the dough wasn't chilled long enough or the butter was too soft. Always chill the dough for at least 30 minutes and use cold butter cubes. Preheat your oven to 350°F and avoid overbaking—pull them when edges are golden but centers are still soft.
How do I store these cookies to keep them fresh?
Store in an airtight container at room temperature for up to 5 days. For longer storage, freeze shaped dough balls for 3 months or baked cookies for 2 months. Reheat baked cookies for 5 seconds in the microwave to restore freshness. The cornstarch helps maintain crispness longer than most recipes.
Can I use this recipe for holiday-shaped cookies?
Roll the chilled dough to ¼-inch thickness and cut with holiday cutters. Sprinkle with colored sugar before baking. For festive flavors, add ½ tsp cinnamon or ¼ tsp nutmeg to the dry ingredients. Just reduce baking time by 1-2 minutes since thinner cookies bake faster.
What's the secret to getting that perfect caramelized sugar crust?
The granulated sugar sprinkle before baking creates those golden spots when caramelized. Use superfine sugar for even distribution, and bake on the middle rack where heat is most even. For extra crunch, broil for 10-15 seconds at the end (watch closely!). The 350°F temperature is crucial—too hot and they'll burn before caramelizing.