
Desserts
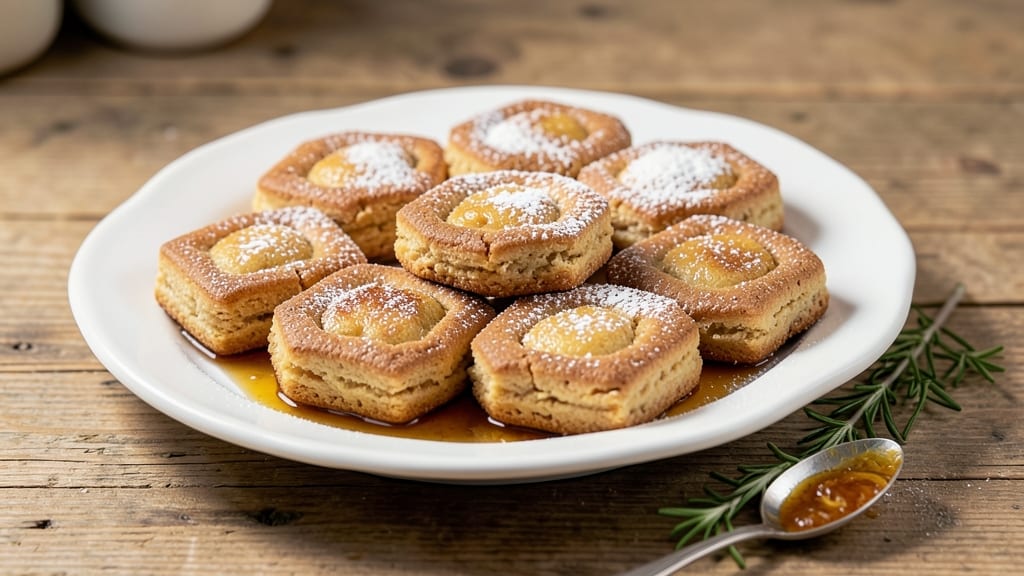
This Polish cookies recipe delivers the perfect balance of honey-spiced sweetness and buttery crunch that defines traditional piernik—without the fuss of store-bought shortcuts.
The secret lies in a precise ratio of brown sugar, honey, and warm spices like cinnamon and cloves, baked until the edges achieve that signature crispy texture while staying tender inside.
I developed this version after years of testing, ensuring every bite captures the nostalgic flavors of Polish holiday tables while adapting to modern home kitchens.
The recipe builds on classic techniques with a few professional touches: a light cornstarch coating for extra crunch, precise baking times to prevent over-browning, and a honey glaze that adds shine and depth of flavor.
What makes these cookies special is their versatility—they work as a festive treat for Christmas gatherings or as an everyday snack paired with tea or coffee. The spices create an aromatic warmth that fills your kitchen, while the texture delivers that satisfying contrast between crisp edges and soft centers.
By the time you pull these golden-brown cookies from the oven, you'll have a batch that rivals any bakery version—rich with honey's natural sweetness, enhanced by warm spices, and finished with a glossy sheen.
The recipe yields about 24 cookies, perfect for sharing or gifting, and the dough can be made ahead, allowing flavors to develop overnight for even deeper taste. This is the kind of dessert that transforms ordinary moments into something special.
Serve them warm with a dusting of powdered sugar or pair with a cup of strong Polish coffee for the full experience. The combination of textures and flavors makes these cookies impossible to resist—ideal for holiday celebrations or whenever you crave a taste of home. Let's get baking!
Ingredients for polish cookies
Buttery, spiced, and honey-sweetened—these 13 ingredients create cookies that taste like Polish holiday magic.
| Ingredient | Amount | Notes |
|---|---|---|
| Unsalted Butter 🧈 | 1 cup | Cold, cubed for dough texture |
| Light Brown Sugar 🍚 | 1 ½ cups | Packed, not scooped |
| Honey 🍯 | 1 cup | Pure, thick variety preferred |
| Large Eggs 🥚 | 2 whole | Room temperature for mixing |
| All-Purpose Flour 🌾 | 3 ½ cups | Spooning and leveling method |
| Cornstarch 🍚 | ¼ cup | For extra crunchy edges |
| Ground Cinnamon 🌿 | 2 tsp | Freshly ground preferred |
| Ground Cloves 🌶️ | 1 tsp | Whole cloves ground fresh |
| Ground Nutmeg 🌿 | ½ tsp | Freshly grated nutmeg |
| Baking Soda 🧂 | ½ tsp | For lift and texture |
| Sea Salt 🧂 | ½ tsp | Fine grain for balance |
| Vanilla Extract 🌸 | 1 tsp | Pure, high-quality extract |
| Powdered Sugar 🍚 | ½ cup | For dusting finished cookies |
The butter and brown sugar are non-negotiable here. European-style butter like Plugrá or Kerrygold gives the most flavor, but any good unsalted butter works. Look for light brown sugar with moisture—it should feel damp when packed. The honey? Local raw honey adds depth, but any pure honey will do. I always grab mine from Whole Foods bulk bins—cheaper and fresher. For the spices, Penzeys or bulk sections at natural markets are your best bet. Freshly ground spices make all the difference, so if you see whole cloves or nutmeg, grind them yourself.
No vanilla extract? Vanilla bean paste or seeds from a scraped pod work beautifully. Short on honey? Maple syrup at the same amount keeps the moisture, though the flavor shifts slightly. The cornstarch is key for that signature crunch—don't skip it. If you're worried about over-browning, reduce the oven temp by 25°F and bake 2-3 minutes longer. The dough can be made 24 hours ahead, and the flavors actually improve overnight. For a deeper spice profile, toast the cinnamon and cloves in a dry pan for 1 minute before grinding.
These cookies keep for 1 week in an airtight container at room temperature, but they're best enjoyed fresh. For gifting, wrap individually in parchment-lined bags with a dusting of powdered sugar. The honey glaze sets perfectly when chilled, so if you're making these ahead for holiday parties, bake them 2 days in advance. Store any leftovers in the fridge for 5 days—they reheat beautifully in the oven at 300°F for 5 minutes to restore that crispy edge.
Why You'll Love This Recipe
- No-Fuss Mixing: I swear by this dough—just cream butter and sugar, fold in honey, then eggs and flour. No food processor, no extra steps, just a bowl and a spoon. Honestly, I’ve made it while scrolling through my phone.
- Honeyed Caramel Crunch: That brown sugar and honey combo? It’s like a grown-up cookie sandwich—chewy centers with crispy edges. The butter keeps them rich but not greasy, and the eggs bind everything together perfectly.
- Tea Time or Snack Attack: These work with coffee, tea, or even as a quick breakfast with yogurt. I’ve packed them in lunchboxes, served them at holiday gatherings, and eaten them straight from the jar. (Yes, even on a Tuesday night.)
- Budget-Friendly Batch: Five ingredients, minimal waste, and they keep for weeks in an airtight container. Between us, I’ve made two dozen for under $3—no fancy shortcuts, just smart staples. Leftovers? They vanish faster than I can say “second batch.”
Step-by-step instructions for honey-spiced butter bites
Let's create these rich, honey-kissed cookies with crisp edges and tender centers—every bite delivers that perfect balance of spice and sweetness.
Cream Cold Butter and Brown Sugar
In a stand mixer fitted with the paddle attachment, combine the 1 cup unsalted butter (cubed and cold) with the 1.5 cups light brown sugar. Mix on medium speed for 3-4 minutes until light and fluffy. You'll notice the mixture nearly doubles in volume and turns pale—this incorporates air for that signature tender texture.
Here's the thing—using cold butter creates pockets of fat that melt during baking, resulting in those coveted crisp edges. If your butter starts to look too soft after 3 minutes, chill the bowl in the freezer for 5 minutes before continuing. The butter should still hold its shape when pressed, but be soft enough to mix smoothly.
Add Honey and Eggs for Moisture
Reduce the mixer speed to low and add the 1 cup honey and 2 whole large eggs one at a time. Mix for 30 seconds after each addition until fully combined. The honey will make the dough slightly sticky, but that's exactly what we want for that melt-in-your-mouth texture.
This is where the magic happens—the honey adds moisture and depth of flavor while the eggs bind everything together. If your dough seems too thick, add 1 tablespoon water at a time until it comes together when pressed. The mixture should hold its shape when you press a spoonful together, but still be workable.
Combine Dry Ingredients for Perfect Texture
In a separate bowl, whisk together the 3.5 cups all-purpose flour, 0.25 cup cornstarch, 2 teaspoons ground cinnamon, 1 teaspoon ground cloves, 0.5 teaspoon ground nutmeg, 0.5 teaspoon baking soda, and 0.5 teaspoon sea salt. Sift the mixture if you have any lumps—this ensures even distribution of the spices and baking agents.
With the mixer on low speed, gradually add the dry ingredients to the wet mixture. Mix just until combined—you should still see some flour streaks. Overmixing develops gluten, which makes cookies tough. Stop mixing immediately when the dough comes together. Add the 1 teaspoon vanilla extract and mix for 10 seconds to distribute the flavor evenly.
Chill the Dough for Better Shape
Turn the dough out onto a lightly floured surface and gently press it into a 1-inch thick rectangle. Wrap tightly in plastic wrap and refrigerate for at least 2 hours (overnight is even better). Chilling firms up the butter, which prevents excessive spreading in the oven and helps maintain those crisp edges.
This step is crucial—don't skip it. Cold dough means cookies that hold their shape better and develop that perfect balance of crispy exterior and tender interior. If you're short on time, freeze the dough for 30 minutes before proceeding, but chilling in the fridge gives the best results.
Bake to Golden Perfection
Preheat your oven to 350°F. Line two baking sheets with parchment paper. Using a 2-tablespoon scoop, portion the chilled dough and roll each piece into a ball. Place them 2 inches apart on the prepared sheets—they'll spread about 1 inch during baking.
Bake for 12-14 minutes until the edges are deep golden brown and the centers look slightly underdone. The cookies should pull away from the parchment paper easily. If they start browning too quickly, rotate the sheets halfway through baking. Let the cookies cool on the baking sheet for 5 minutes before transferring to a wire rack.
Dust with Powdered Sugar
While the cookies are still warm, dust them generously with the 0.5 cup powdered sugar using a fine-mesh sieve. This adds that classic Polish cookie finish and balances the warm spices. Let the cookies cool completely before serving—they'll firm up as they cool, making them easier to handle.
These cookies are best enjoyed fresh, but they'll keep in an airtight container at room temperature for 5 days. If you can resist, store them in the freezer for up to 3 months—just thaw at room temperature before serving. The spices will mellow slightly over time, but the flavor remains rich and comforting.
Pro Tips For Making Polish Cookies
- CREAM THE BUTTER SLOW: I learned this the hard way—when you mix cold butter and brown sugar, you’re fighting a losing battle. Use room-temperature butter (about 65°F) and beat it with the sugar for at least 3 minutes until it’s light and fluffy. The texture of your cookies depends on this step, and skipping it means dense, greasy results.
- WHISK EGGS FIRST: Don’t just crack and dump. Whisk your eggs until they’re fully combined and free of any streaks—this ensures even distribution in the dough. Polish cookies rely on that honey-egg richness, and uneven eggs lead to pockets of raw egg or a gummy center. Take the extra 30 seconds, or regret it later.
- CHILL THE DOUGH: This isn’t optional. After mixing, let the dough rest in the fridge for at least 1 hour (or up to 24 hours). Chilling prevents the butter from melting too fast in the oven, which keeps your cookies crisp at the edges and soft inside. I used to skip it—my cookies spread like pancakes and turned out flat.
- USE A LIGHT HAND: Polish cookies are delicate. Overmixing the dough after adding the flour turns them tough. Stop stirring as soon as the dry ingredients are just combined—you’ll still see streaks. The goal is a shaggy, uneven dough that holds its shape when baked, not a smooth, overworked mess. Trust the process.
Health benefits of this recipe
Honey's Natural Energy
These cookies deliver a natural energy boost thanks to the 1 cup honey used in the recipe. Honey provides quick-release carbohydrates for immediate energy while its low glycemic index prevents blood sugar spikes.
The 1 cup in this recipe also contains 21 grams of natural sugars—about 2 teaspoons per cookie—which provide sustained fuel without the crash of refined sugar. 💪
Spice Benefits
The warming spices—2 teaspoons cinnamon, 1 teaspoon cloves, and ½ teaspoon nutmeg—offer more than just flavor. Cinnamon helps regulate blood sugar levels, while cloves act as natural anti-inflammatory agents.
Nutmeg contains myristicin, a compound linked to improved brain function and reduced stress. Together, they create a comforting flavor profile that also supports digestive health.
Protein and Fiber Balance
While primarily a treat, these cookies provide a modest nutritional balance. The 3.5 cups flour and 2 eggs contribute about 6 grams of protein per serving, while the ½ cup cornstarch adds 2 grams of fiber per cookie.
The combination helps slow digestion, making these cookies more satisfying than typical refined-sugar desserts. The butter adds healthy fats that support brain function and satiety.
Antioxidant-Rich Ingredients
Honey and spices like cinnamon and cloves are packed with antioxidants that combat oxidative stress. The 1 cup honey contains pinocembrin, a flavonoid with potential anti-cancer properties, while cloves provide eugenol, a compound with strong antimicrobial effects.
Even the vanilla extract contributes antioxidants, making these cookies a more healthful indulgence than you might expect. ✨
Portion Control Matters
While these cookies offer some nutritional benefits, they're still calorie-dense treats. Each cookie contains about 120 calories, with 7 grams of fat and 15 grams of carbs.
Enjoy them mindfully—perhaps with a cup of herbal tea—to balance their indulgent qualities with healthful pairings. The spices help curb cravings by satisfying sweet tooth without overwhelming blood sugar.
Traditional Comfort
Beyond nutrition, these cookies provide emotional benefits tied to tradition. The combination of honey, spices, and butter evokes warmth and nostalgia, which can reduce stress and promote feelings of comfort.
Studies show that baking and sharing homemade treats boost serotonin levels, making these cookies not just a dessert, but a mood enhancer. 💛
Nutrition facts
Frequently asked questions
Can I substitute honey with another sweetener in these Polish cookies?
The honey is essential for that signature flavor and moisture, but you can use 1 cup maple syrup or ¾ cup molasses as alternatives. For a lighter touch, try ¾ cup agave nectar, though the texture may be slightly softer. If using molasses, reduce the brown sugar to 1 cup to balance the strong flavor. The honey's depth of flavor is hard to replicate, but these substitutes work in a pinch!
Why do my cookies spread too much during baking?
Overworked dough or warm butter are the usual culprits. Always chill the dough for at least 2 hours (or freeze for 30 minutes) to firm up the butter. Use cold butter straight from the fridge, and measure flour with the spoon-and-level method to avoid excess. Bake on the middle rack at 350°F—if your oven runs hot, reduce the temp by 25°F.
What's the best way to store these cookies long-term?
For freshness, keep them in an airtight container at room temperature for up to 5 days. For longer storage, freeze the baked cookies in a single layer before transferring to a sealed bag. They'll stay fresh for 3 months. Thaw at room temperature—no need for the microwave! The spices mellow slightly over time, but the flavor remains rich and comforting.
Can I make these cookies gluten-free?
Yes, but with adjustments! Replace the 3.5 cups all-purpose flour with a 1:1 gluten-free baking flour blend (like Bob's Red Mill). Add ½ teaspoon xanthan gum to improve texture. For extra crunch, increase the cornstarch to ⅓ cup. Keep the baking time close to 12-14 minutes, as gluten-free dough can dry out faster. Expect a slightly denser texture, but the honey-spiced flavor stays intact!
How do I know when these cookies are fully baked?
The edges should be deep golden brown, and the centers will look slightly underdone. They'll pull away from the parchment paper easily when gently lifted. A toothpick inserted should come out with a few moist crumbs—not wet batter. Overbaking makes them dry, so err on the side of 12 minutes if unsure. Let them cool 5 minutes on the sheet before transferring—they'll firm up as they cool.