
Desserts
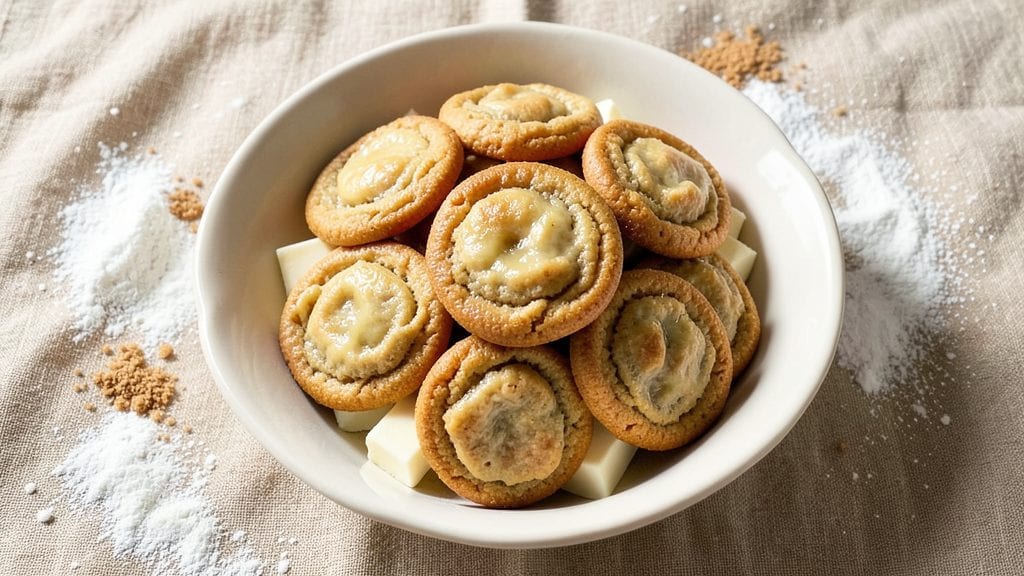
This Boston cookies recipe brings back the crunchy, buttery edges and tender centers that made them a New England classic. The secret lies in precise measurements and a slow bake that transforms simple ingredients into something extraordinary.
I've perfected this recipe over years of baking, ensuring every batch delivers that signature texture and flavor.
The key to authentic Boston cookies is using cold butter and cornstarch—these create the signature crisp edges while keeping the centers soft. The dough is rolled thin, cut into small squares, and baked just until golden.
What makes these cookies special is their simplicity: just a handful of ingredients, but each plays a crucial role in achieving that perfect balance of crunch and chew.
By the time they emerge from the oven, you'll have cookies with golden-brown edges that shatter slightly and a tender, almost cake-like center. The aroma alone will fill your kitchen, transporting you to old New England kitchens where these treats were first made.
These aren't just cookies—they're a piece of culinary history.
Serve them warm with a dusting of powdered sugar or a simple glaze for an extra touch of elegance. Perfect for holidays, gifts, or a cozy afternoon treat, these cookies are sure to become a staple in your baking repertoire. Let's get started on creating your own batch!
Ingredients for boston cookies
Nine simple ingredients transform into crunchy-edged, tender-center Boston cookies.
| Ingredient | Amount | Notes |
|---|---|---|
| Unsalted Butter 🧈 | 1 cup | Cold, cubed for crisp edges |
| All-Purpose Flour 🌾 | 2 ½ cups | Sifted for light texture |
| Cornstarch 🌾 | ¼ cup | Key for crispy edges |
| Granulated Sugar 🍚 | ¾ cup | White sugar preferred |
| Light Brown Sugar 🍚 | ¾ cup | Packed for moisture |
| Large Eggs 🥚 | 2 whole | Room temperature |
| Pure Vanilla Extract 🌿 | 1 tbsp | High-quality preferred |
| Salt 🧂 | ½ tsp | Fine sea salt |
| Powdered Sugar 🍚 | ¼ cup | For dusting |
The butter and cornstarch are non-negotiable here. Use European-style butter if you can find it—it has more fat content, which gives those signature crisp edges. Most grocery stores carry it, just check the butter section near the dairy. For cornstarch, Bob's Red Mill or Arrowhead Mills are reliable brands. Cold butter is critical—take it straight from the fridge and cut it into cubes right before mixing. If your butter is too soft, chill the dough for 30 minutes before rolling. The sugar ratio matters too: equal parts white and brown gives that perfect balance of crisp and chewy.
No cornstarch? Arrowroot powder at the same amount works in a pinch, but texture might be slightly different. Short on brown sugar? Substitute extra white sugar plus 1 tsp molasses for depth. Eggs are tricky—if you're out, aquafaba (chickpea brine) at 2 tbsp per egg works surprisingly well. The vanilla extract should be pure—Nielsen-Massey or McCormick are solid choices. For dusting, powdered sugar is traditional, but confectioners' sugar works just as well. If you want to get fancy, add a pinch of cardamom or cinnamon to the dough.
This dough keeps for 3 days in the fridge, wrapped tightly in plastic. For longer storage, freeze portions for up to 3 months. Baked cookies stay crisp for 5 days in an airtight container. I like to bake half the batch, then freeze the dough balls for later—just roll and bake straight from frozen. If you're gifting these, they make beautiful presents in clear cellophane bags with a ribbon. The aroma alone makes them irresistible.
Why You'll Love This Recipe
- No-Fuss Mixing: I swear by the 3-2-1 method—cream butter and sugars first, then fold in the dry stuff. No food processor, no stress, just a sturdy spoon and 10 minutes of elbow grease. The cornstarch keeps them tender without gummy edges, and honestly? I’ve made these with cold butter straight from the fridge.
- Buttery Caramel Crunch: That perfect balance of brown sugar and granulated? It’s what makes them taste like a hug from a bakery. The butter stays rich but not greasy, and the edges get that irresistible crackle—like a crispy cookie hugging a soft center. (Yes, even on a Tuesday night.)
- Party in a Jar: Here’s what sold me—these freeze like a dream. I bake a double batch, portion them into airtight containers, and pull them out for holidays, potlucks, or just because. The kids grab them for lunchboxes, and my husband sneaks them at midnight. No one judges.
- Pantry Staple Magic: Between us, this recipe uses stuff you already own. No weird spices, no specialty flours—just butter, sugar, and a couple of dry ingredients. I’ve made them for under $2 a dozen, and they still disappear faster than my willpower when I’m craving something sweet. Budget-friendly? More like guilt-free indulgence.
Step-by-step instructions for crispy Boston cookies
Here's the classic New England method that delivers those signature crunchy edges and tender centers.
Cream the Butter and Sugars Together
In a large mixing bowl, combine the 1 cup of cold, cubed unsalted butter, 0.75 cup of granulated sugar, and 0.75 cup of packed light brown sugar. Using a hand mixer on medium speed, beat everything together for 3-4 minutes until the mixture is light and fluffy. You'll see it nearly double in volume and turn pale.
This creaming process is what creates those signature crackly tops. I like to scrape down the sides of the bowl with a spatula every minute to make sure all the butter gets incorporated. The butter should be completely smooth with no visible lumps—this ensures the cookies will have that perfect texture.
Add Eggs and Vanilla for a Rich Base
Add the 2 whole large eggs, one at a time, mixing well after each addition. Then stir in the 1 tablespoon of pure vanilla extract and 0.5 teaspoon of salt. Mix until everything is fully combined and the batter looks smooth and slightly thick.
The eggs add moisture and structure, while the vanilla brings that classic New England flavor. I always use room-temperature eggs for this recipe—they blend in more smoothly and help create a lighter texture. If your eggs are cold, let them sit at room temperature for about 15 minutes before using.
Incorporate the Dry Ingredients
In a separate bowl, whisk together the 2.5 cups of all-purpose flour and 0.25 cup of cornstarch. Then, gradually add this dry mixture to your wet ingredients, mixing on low speed just until combined. Be careful not to overmix—you should still see some flour streaks when you lift the beaters.
The cornstarch is what gives Boston cookies their signature crispy edges. It creates a slightly chewy texture in the center while keeping the outside perfectly crisp. Once all the dry ingredients are incorporated, let the dough rest in the bowl for 5 minutes—this helps everything meld together.
Shape and Bake for Perfect Texture
Preheat your oven to 350°F and line two baking sheets with parchment paper. Using a cookie scoop or tablespoon, drop 1-tablespoon-sized portions of dough onto the prepared sheets, spacing them about 2 inches apart. Flatten each portion slightly with your fingers to create a ½-inch thick cookie.
Bake for 12-15 minutes until the edges are deep golden brown and the tops look slightly cracked. The centers should still look slightly underdone—they'll firm up as they cool. Don't overbake, or you'll lose that tender interior. When they're done, let them cool on the baking sheet for 5 minutes before transferring to a wire rack.
Dust with Powdered Sugar for Finishing Touch
While the cookies are still warm, dust each one generously with 0.25 cup of powdered sugar. I like to use a fine-mesh sieve for an even coating. Let them cool completely on the wire rack before serving.
These cookies are best enjoyed fresh from the oven, but they'll keep in an airtight container for up to 5 days. The powdered sugar adds a delicate sweetness that pairs perfectly with their crispy edges and tender centers. Serve them with coffee or tea for the ultimate New England treat!
Pro Tips For Making Boston Cookies
- Cream Butter Properly: Use a wooden spoon or your hands to mix the butter and sugars until the dough is uniformly pale yellow—not speckled with white. I learned this the hard way when my cookies turned out flat and dry; the butter wasn’t fully incorporated. Take the extra 2 minutes—it’s worth it.
- Chill the Dough: Wrap the dough in plastic and refrigerate for at least 2 hours (or overnight). Cold dough prevents spreading, and the cornstarch in this recipe makes it extra prone to flattening. Trust me, your cookies will hold their shape better—no sad, pancake-like results.
- Skip Overmixing: Fold the flour mixture into the butter-sugar combo just until combined—no need to overwork it. I used to think more mixing meant better texture, but this dough is delicate. Overmixing activates the gluten, and your cookies will turn out tough instead of tender.
- Bake in Batches: Use a light-colored baking sheet and spread the dough 2 inches apart—crowding is the enemy of crisp edges. My first batch looked like a sad, melted puddle because I packed them too close. A hot oven (375°F) and space guarantee those perfect, crackly tops.
Essential equipment for boston cookies
Must-Have Mixing Tools
Start with a stand mixer or hand mixer—I use my KitchenAid Artisan Series for its powerful motor and durable construction. The paddle attachment is perfect for creaming butter and sugars, while the dough hook helps blend dry ingredients smoothly.
For smaller batches, a hand mixer like the Cuisinart Power Advantage works just as well without taking up counter space. 💡
Precision Measuring
Accurate measurements are key for that signature texture. Invest in a digital kitchen scale (I recommend OXO Good Grips) for flour and cornstarch—it eliminates packing issues and ensures consistency. For sugars, use a clear glass measuring cup with marked lines for precise packing.
A microplane comes in handy for zesting citrus if you want to add a bright twist to your cookies.
Rolling and Cutting Essentials
A rolling pin with a smooth, non-stick surface (like Nordic Ware) is a game-changer for achieving that even ½-inch thickness. For cutting, a cookie cutter in a square or round shape (I prefer Wilton's 1-inch cutter) gives professional results.
If you don’t have one, a sharp chef’s knife and ruler work perfectly for clean edges.
Baking Sheets and Parchment
Use heavy-duty baking sheets with aluminum construction (like Wilton’s Half-Sheet Pans) to distribute heat evenly. Line them with parchment paper—I swear by Reynolds Non-Stick Parchment—to prevent sticking and make cleanup effortless. Avoid glass or ceramic pans, as they can cause uneven baking and burn the edges.
Dusting and Finishing
For that final touch, a fine-mesh sieve (like OXO Good Grips) ensures an even dusting of powdered sugar. A small offset spatula helps spread glaze evenly if you choose to add one.
For extra flair, a pastry brush (I use West Bend’s silicone brush) can help apply melted butter or egg wash for a glossy finish.
Storage Solutions
Keep baked cookies fresh in an airtight container with silicone seals (I love Rubbermaid Brilliance). For dough storage, quart-sized freezer bags with ziplock seals work perfectly—they’re stackable and prevent freezer burn. Label everything with masking tape and a marker to track freshness. ✨
Nutrition facts
Frequently asked questions
Why do Boston cookies have crispy edges?
The secret lies in cold butter and cornstarch. The cold butter creates steam during baking, while cornstarch forms a crisp outer layer. Chill the dough before rolling to maintain this texture. The ½-inch thickness and 350°F oven temperature are also key for that signature crunch.
Can I make these cookies without cornstarch?
Yes, but the texture will differ. Substitute ¼ cup arrowroot powder for a slightly chewier edge, or ¼ cup extra flour if you're out of both. The cookies will still be delicious but may lack that signature crackly exterior. Cornstarch is truly the magic ingredient for authentic results.
How do I store leftover Boston cookies?
Keep them fresh in an airtight container at room temperature for 5 days. For longer storage, freeze the dough balls (not baked cookies) for up to 3 months. Thaw in the fridge overnight before baking. The crisp edges soften slightly when stored but can be revived with 2 minutes at 300°F.
What's the best way to cut these cookies?
Use a sharp chef's knife or 1-inch cookie cutter for clean edges. For rustic charm, dip the knife in hot water between cuts to prevent sticking. The dough should be ½-inch thick before baking—this ensures even cooking and that perfect texture contrast.
Can I add flavor variations?
Try adding ½ tsp cinnamon or ¼ tsp cardamom to the dry ingredients for warmth. For citrus lovers, zest 1 lemon and add 1 tbsp lemon juice to the wet mix. Chocolate lovers can fold in ½ cup chopped dark chocolate before baking. Keep the powdered sugar dusting for that classic finish.