
Desserts
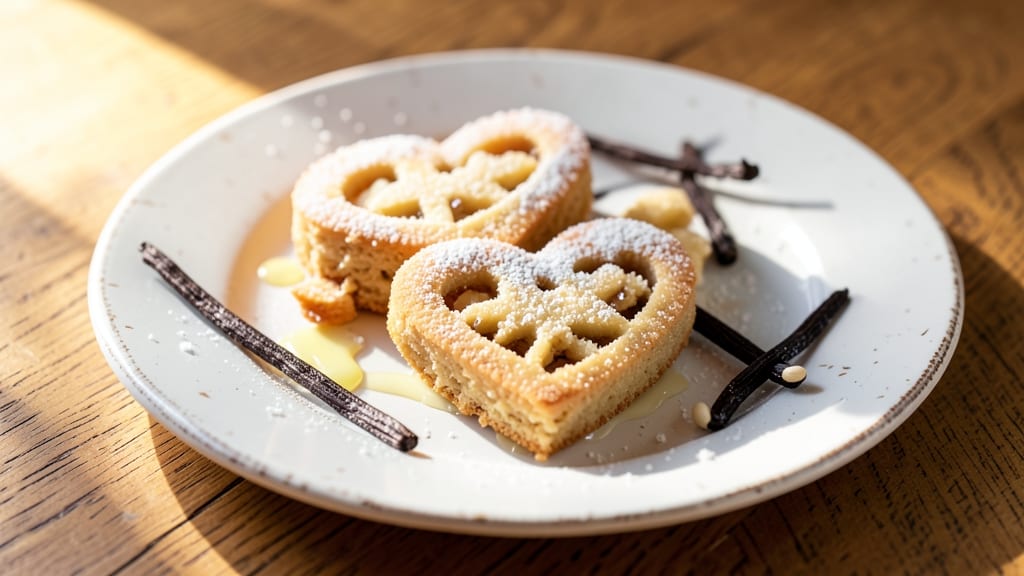
Heart-shaped shortbread cookies are the perfect way to add a touch of romance to Valentine’s Day—or any occasion that calls for delicate, buttery crunch. ✨ This recipe delivers restaurant-quality results in just 10 minutes of active time, with a foolproof method for shaping and baking cookies that stay crisp yet tender. The secret lies in chilling the dough and using a heart-shaped cutter for precision every time.
What makes these cookies special is their rich, buttery texture—achieved by mixing cold butter and flour until the dough forms crumbly clumps. This technique ensures they bake up golden and crisp around the edges while remaining melt-in-your-mouth tender inside.
No rolling pins or fancy equipment are needed; just a few simple ingredients and a heart-shaped cutter transform basic pantry staples into something extraordinary.
By the time you pull them from the oven, you’ll have perfectly shaped, golden-brown hearts with a delicate crunch that’s impossible to resist. The aroma of vanilla and butter fills the kitchen, making them irresistible to guests—or just to you, enjoying a quiet moment with a cup of tea.
These cookies are simple enough for beginners but impressive enough to serve at holiday gatherings.
Pair them with a dusting of powdered sugar, a drizzle of melted chocolate, or a sprinkle of edible glitter for extra flair. They stay fresh for up to a week in an airtight container, making them ideal for gifting or prepping ahead. Let’s get baking!
Ingredients for heart shaped shortbread cookies
Nine simple ingredients transform into delicate, buttery heart cookies perfect for Valentine’s Day celebrations.
| Ingredient | Amount | Notes |
|---|---|---|
| Unsalted Butter 🧈 | 1 cup | Cold, cubed for texture |
| All-Purpose Flour 🌾 | 2 cups | Sifted for light texture |
| Granulated Sugar 🍚 | ¼ cup | Fine grain preferred |
| Pure Vanilla Extract 🍯 | 1 tsp | High-quality for flavor |
| Kosher Salt 🧂 | ½ tsp | Fine grain preferred |
| Powdered Sugar 🍚 | ½ cup | For dusting finished cookies |
| Heart-Shaped Cookie Cutter ❤️ | 1 piece | Metal preferred for precision |
| Melted White Chocolate 🍫 | ¼ cup | Optional for drizzling |
| Edible Gold Leaf 💛 | 2 sheets | Optional for festive touch |
The butter is non-negotiable here—European-style unsalted gives the best flavor and texture. Plugrá or Kerrygold are my go-tos, but any good-quality brand works. Keep it cold until mixing to prevent melting. The flour should be sifted first for a lighter dough, and if you're in a pinch, a fine-mesh strainer works too. Vanilla extract matters—look for pure vanilla (not imitation) in the baking aisle. The powdered sugar isn't just for dusting; it adds tenderness to the dough, so don't skip it. For the cookie cutter, Wilton or Oxo brands are reliable, but any metal cutter will do.
No vanilla extract? Vanilla bean paste at half the amount adds seeds for extra flavor. Short on powdered sugar? Granulated sugar at the same quantity works in a bind, though the texture won't be quite as tender. Want to skip the white chocolate drizzle? A sprinkle of crushed pistachios or candied ginger adds crunch. The edible gold leaf is optional but adds that restaurant-quality touch—available at craft stores or online. If you can't find it, a light dusting of powdered sugar with a stencil works too. For extra romance, infuse the dough with a tiny pinch of rosewater (just 1/8 tsp) before baking.
Store the dough in the fridge for up to 3 days wrapped tightly in plastic. Once baked, these cookies stay fresh for 1 week in an airtight container at room temperature. For gifting, package them in clear cellophane bags tied with ribbon—they’ll keep for 5 days that way. If you make extras, freeze unbaked dough balls for 3 months and bake straight from frozen (add 1-2 minutes to baking time). The aroma while baking? Worth every minute.
Why You'll Love This Recipe
- Four-Ingredient Magic: I swear by this combo—just butter, flour, sugar, and vanilla. No fancy mix-ins, no stress. The dough comes together in minutes, and those little hearts? Pure joy with zero fuss.
- Crispy-Creamy Bliss: That perfect snap when you bite in, followed by melt-in-your-mouth richness? It’s all in the cold butter and slow bake. Honestly, my kids fight over them before they even cool.
- Holiday or Snack Attack: Stash them in the fridge for last-minute gifts or toss a batch in your purse for a sweet emergency. They’re just as welcome at a Valentine’s brunch as they are on your desk when you need a pick-me-up.
- Budget-Friendly Treats: A single stick of butter and a bag of flour stretch forever—these cookies cost pennies to make but taste like they’re from a bakery. Leftovers? They’ll disappear faster than you can say “second helping.”
Step-by-step instructions for heart-shaped shortbread cookies
Here's the method for delicate, melt-in-your-mouth shortbread with perfect heart shapes every time.
👨🍳 Step 1: Cut and Chill the Butter for Optimal Texture
Place the 1 cup unsalted butter in the freezer for 15 minutes until firm but still pliable. Cut it into ¼-inch cubes using a sharp knife—this ensures even distribution and prevents overworking the dough. The cold butter creates those signature flaky layers that make shortbread so special.
While the butter chills, sift together the 2 cups all-purpose flour, 0.25 cup granulated sugar, 0.5 tsp kosher salt, and 1 tsp pure vanilla extract in a medium bowl. This pre-sifting prevents lumps and ensures a light, airy texture. I like to press the mixture through a fine-mesh sieve for extra smoothness—it makes all the difference in the final crumb.
🍳 Step 2: Combine Ingredients for a Crumbly Dough
Add the chilled butter cubes to the dry ingredients and use your fingers to work them into the flour mixture. Press the butter pieces between your fingers until they're the size of small peas—this creates those beautiful flaky layers when baked. Be gentle here; you're not trying to create a smooth dough, just an even distribution of butter.
Once the butter is evenly incorporated, use your hands to mix until the dough just comes together. It should be crumbly but hold when pressed—this is key for shortbread. If it feels too dry, add 1 teaspoon of ice water (from the freezer) to help bind it. The dough should resemble coarse sand when you squeeze it, not pack together like wet sand.
🥘 Step 3: Press and Cut for Perfect Hearts
Turn the dough onto a lightly floured surface and gently press it into a ½-inch thick rectangle about 12x8 inches. I use a rolling pin for this, but don't press too hard—shortbread should be firm but not dense. The goal is to create an even thickness that bakes uniformly.
Cut out hearts using the heart-shaped cookie cutter, pressing straight down without twisting. Place the cutouts ½ inch apart on a parchment-lined baking sheet. For extra security, I like to gently press the dough scraps back together and re-roll them once—this minimizes waste and ensures consistent shapes.
⏰ Step 4: Bake Until Golden and Fragrant
Preheat your oven to 325°F—this lower temperature prevents the cookies from spreading too much while ensuring even baking. Bake the cookies for 12-15 minutes until the edges are light golden brown and the centers look just slightly underdone. The oven should smell like vanilla and butter by this point—that's your cue they're ready.
Remove the cookies from the oven and let them cool on the baking sheet for 5 minutes before transferring to a wire rack. This brief resting period prevents them from cracking as they cool completely. While they're still warm, dust the tops with the 0.5 cup powdered sugar using a fine-mesh sieve for that classic shortbread finish.
🍽️ Step 5: Decorate and Serve (Optional Finishes)
For the melted white chocolate drizzle, carefully spoon the chocolate into a piping bag fitted with a small round tip. Pipe decorative lines across the cooled cookies or create simple heart shapes. Let the chocolate set for 10 minutes before serving—this prevents messy drips.
For the edible gold leaf, gently press the 2 sheets onto the cooled cookies using a soft brush. The leaf should adhere to the slightly sticky surface of the white chocolate or the sugar-dusted cookies. These optional decorations add a luxurious touch perfect for Valentine's Day gifting—just handle them carefully to avoid tearing.
Pro Tips For Making Heart Shaped Shortbread Cookies
- Chill the Dough: Stick the dough in the fridge for at least 2 hours—yes, even if you’re impatient like me. I used to skip this and end up with sad, crumbly cookies that spread like a bad rumor. Cold butter behaves better, and the hearts hold their shape.
- Use Cold Butter: Cut that unsalted butter straight from the fridge into cubes—no softening, no exceptions. The moment you let it warm up, your shortbread turns greasy and loses that signature snap. Trust me, your cookies will thank you.
- Skip the Overmixing: Toss the flour, sugar, and salt together, then cut in the butter just until it resembles coarse crumbs. Overmixing turns shortbread into a sad, dense brick. Keep it rough—it’s supposed to look like sand, not cake batter.
- Press Hearts Thin: Roll the dough to about ¼-inch thickness—any thicker, and your hearts won’t bake evenly. Use a heart-shaped cutter and press firmly so the edges stay crisp. If it sticks, dust with more flour, but don’t overdo it or the texture suffers.
Common mistakes when making your heart shaped shortbread cookies
Overworking the Dough
Shortbread dough is delicate—overmixing or pressing too hard turns it tough instead of tender. I’ve ruined batches by rolling the dough too thin or pressing aggressively with a rolling pin. The key is to handle it gently, just enough to create an even ½-inch thickness.
If the dough cracks or feels gummy, it’s been overworked. Let it rest in the fridge for 10 minutes before re-rolling if needed. 💡
Skipping the Chill
Cold butter is non-negotiable for that signature shortbread crunch. If you skip chilling the butter or dough, the cookies will spread too much and lose their delicate texture. Always cut the butter into ¼-inch cubes and chill for 15 minutes before mixing.
For extra insurance, press the dough into a disk, wrap it tightly in plastic, and refrigerate for 30 minutes before rolling. This ensures clean cuts and even baking.
Using Warm Butter
Warm butter melts into the flour, creating a dense, cake-like texture instead of the desired crumbly shortbread. If your kitchen is warm, place the butter in the freezer for 20 minutes before cutting it into cubes. Test it by pressing a cube—it should dent slightly but hold its shape.
If it feels soft or greasy, return it to the freezer for another 5 minutes. This small step makes all the difference in texture.
Incorrect Oven Temperature
Baking at too high a temperature causes shortbread to spread and turn greasy, while too low a temperature leaves them undercooked. Stick to 325°F for perfect results—this temperature ensures even baking without over-browning.
Preheat your oven for at least 15 minutes before baking to maintain consistency. I also recommend using an oven thermometer to verify accuracy, as home ovens can vary by 25°F or more.
Overcrowding the Baking Sheet
Placing cookies too close together traps steam, leading to soggy bottoms and uneven baking. Leave at least ½ inch of space between each heart-shaped cookie on the baking sheet. If you’re short on space, bake in batches—your first batch will stay fresh while the second bakes.
I use two parchment-lined sheets to maximize space without sacrificing quality. This simple step ensures crisp edges and a perfect golden color. ✨
Ignoring the Resting Time
Shortbread needs that 5-minute rest on the baking sheet before transferring to a wire rack. Skipping this step causes the cookies to crack as they cool, ruining their delicate appearance. The brief rest allows the edges to set slightly, locking in their shape.
For extra insurance, let the cookies cool completely before decorating—this prevents powdered sugar or chocolate from melting or sliding off. Patience here pays off in presentation and texture. 💫
Nutrition facts
Frequently asked questions
Can I make these heart cookies without a heart-shaped cutter?
Use a round cutter and carefully cut a small triangle from the bottom edge to create a heart shape. For a faster option, press the dough into a ½-inch thick rectangle, then use a knife to score heart outlines before baking. The edges will naturally crisp up for a rustic look.
Why did my shortbread turn out greasy?
Greasy shortbread usually means the butter melted during mixing. Always use cold butter cubes and work quickly—never let the dough sit at room temperature. If your kitchen is warm, chill the dough for 20 minutes before rolling. The butter should remain firm but pliable when pressed.
How do I store heart cookies for gifting?
Place cookies in an airtight container with parchment paper between layers to prevent sticking. They stay fresh for 5 days at room temperature. For longer storage, freeze unbaked dough balls for 3 months—bake straight from frozen (add 1-2 minutes). Package finished cookies in clear cellophane bags tied with ribbon for a festive touch.
Can I add citrus zest to the dough?
Yes! Replace the vanilla with 1 teaspoon lemon or orange zest for a bright twist. Use ½ teaspoon zest if you want to keep the vanilla flavor. For a balanced taste, reduce the sugar slightly to ¼ cup since citrus adds natural sweetness. The zest pairs beautifully with the buttery richness.
What's the secret to perfectly crisp edges?
The key is baking at 325°F for the full 12-15 minutes until edges are golden. Don't overcrowd the tray—leave ½ inch between cookies. For extra crunch, brush the tops with melted butter before baking. The low heat ensures even baking without spreading.