
Desserts
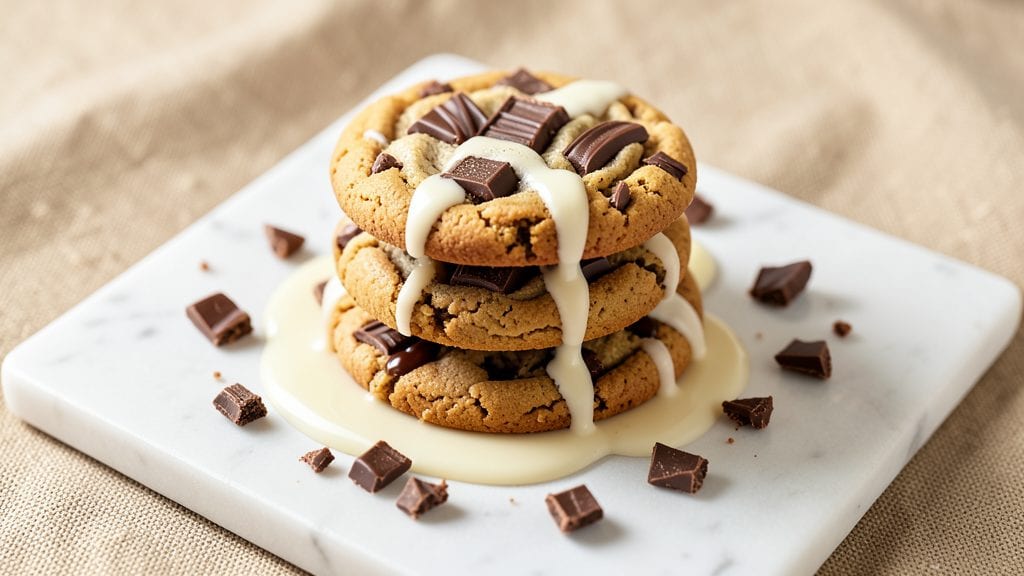
This Kit Kat cookie recipe delivers the perfect marriage of crispy chocolate wafer bites and rich, chewy cookie dough—just like the candy bar you love. The secret lies in baking the cookies in stages to create that signature crunch while keeping the center tender.
I've perfected this technique over years of testing, and it never fails to impress even the most discerning chocolate lovers.
What makes these cookies truly special is the balance of textures—crispy chocolate wafer pieces surrounded by soft, buttery cookie dough that's just sweet enough. The recipe uses simple pantry staples but requires precise timing to achieve that ideal doneness.
With just 15 minutes of active prep and 12 minutes in the oven, you'll have cookies that taste like a bite of nostalgia.
By the time you pull them from the oven, you'll have golden-brown cookies with crispy wafer edges and a gooey chocolate center that melts into the cookie dough.
The aroma alone will have everyone gathering in the kitchen, and the first bite delivers that familiar Kit Kat experience in every mouthful. These cookies are perfect for sharing or saving for your own indulgence.
Whether you're baking for a party or treating yourself to a special dessert, this recipe delivers professional-quality results every time. The technique is straightforward, but the payoff is worth every minute of effort. Let's get baking!
Ingredients for kit kat cookie
Simple pantry staples plus a few chocolatey surprises—just 11 ingredients for cookies that taste like nostalgia.
| Ingredient | Amount | Notes |
|---|---|---|
| Unsalted Butter 🧈 | 1 cup | Full-fat, softened to room temperature |
| Granulated Sugar 🍚 | ¾ cup | White sugar preferred for classic taste |
| Packed Brown Sugar 🍚 | ¾ cup | Light or dark brown sugar works |
| Large Eggs 🥚 | 2 whole | Room temperature for even mixing |
| Vanilla Extract 🍯 | 1 tsp | Pure vanilla extract preferred |
| All-Purpose Flour 🌾 | 2 cups | Sifted for light texture |
| Baking Soda 🧂 | ½ tsp | Ensures proper rise |
| Salt 🧂 | ½ tsp | Kosher or sea salt |
| Dark Chocolate Wafer Bites 🍫 | 1 ½ cups | Kit Kat wafer pieces, roughly chopped |
| Milk Chocolate Chips 🍫 | 1 cup | Semi-sweet for classic flavor |
| Powdered Sugar 🍚 | ¼ cup | For dusting finished cookies |
The butter and sugars matter here. Use full-fat butter—it keeps the cookies rich and tender, not dry. I grab the Land O'Lakes or Plugrá brands—they're reliable for baking. Brown sugar adds moisture and chew, so don't skip it. For the chocolate wafer bites, Kit Kat bars work best—the crispy texture is key. If you can't find them, Crunchie or Butterfinger bars chopped into small pieces are decent swaps. Just make sure they're roughly the same size so they bake evenly.
No vanilla extract? Almond extract at half the amount works in a pinch, but the flavor won't be identical. Short on milk chocolate chips? White chocolate chips add a sweet contrast, but stick to semi-sweet for that classic Kit Kat taste. The baking soda is non-negotiable—it's what gives these cookies that lift. If you're using a different brand of flour, add an extra 0.25 tsp of baking soda to compensate for lower protein content. And for the love of cookies, measure your flour by weight if you can—it's the only way to get consistent results.
Store the dough in an airtight container in the fridge for up to 3 days—it actually tastes better after a night in the fridge. Baked cookies keep at room temperature for 5 days in an airtight container, but they're best enjoyed fresh. For parties, bake half the batch, then freeze the dough balls on a tray before transferring to a bag. Freeze for up to 3 months—just add 1-2 minutes to baking time when you're ready to bake.
Why You'll Love This Recipe
- No-Fuss Mixing: I swear by this recipe because it’s basically a dump-and-fold situation. Cream butter and sugars until light, toss in eggs and vanilla, then fold in chopped Kit Kats—no fancy techniques, no waiting for dough to rest. Honestly, the hardest part is resisting eating the dough straight from the bowl.
- Crunchy-Creamy Magic: That perfect balance of crispy Kit Kat edges and soft, buttery cookie centers? It’s what makes these cookies ridiculous. The brown sugar caramelizes just enough to stick to the chocolate, while the vanilla rounds out the richness. (Yes, even on a Tuesday night.)
- Party in a Jar: Between us, these are my go-to for last-minute gatherings. They’re sturdy enough to pack in a jar for potlucks, sturdy enough to ship to friends, and sturdy enough that kids won’t crush them before dessert. Plus, the Kit Kats add a fun, recognizable twist that always gets compliments.
- Budget-Friendly Comfort: I make a double batch and freeze half—because $5 of butter and sugar stretches far, and I can pull out cookies for weeks. The eggs and vanilla are pantry staples, and the Kit Kats? A single box lasts me three batches. Not the prettiest, but the taste makes up for it every time.
Step-by-step instructions for Kit Kat cookie recipe
Here's how to make these irresistibly crispy cookies with that perfect Kit Kat crunch.
Cream the Butter and Sugars Together
In a stand mixer fitted with the paddle attachment, beat the 1 cup unsalted butter on medium speed until completely smooth and free of lumps. This should take about 30 seconds. Add the 0.75 cup granulated sugar and 0.75 cup packed brown sugar and continue beating on medium speed for 3-4 minutes.
You'll know it's ready when the mixture is light and fluffy, nearly doubling in volume. The butter should be completely incorporated and the sugars should be fully dissolved. This creaming process is crucial for creating that signature crispy texture and airy crumb. If you're doing this by hand, use a sturdy mixing bowl and your arm muscles—it'll take about 5 minutes of vigorous beating.
Add Eggs and Vanilla Extract
Add the 2 whole large eggs one at a time, mixing well after each addition. Then add the 1 teaspoon vanilla extract and mix for another 10-15 seconds until fully combined. The mixture will look slightly curdled at first, but don't worry—it will come together when we add the dry ingredients.
I always use room temperature eggs for this recipe. They mix more smoothly into the butter mixture and help create a lighter texture. If your eggs are cold, let them sit at room temperature for about 30 minutes before using. The vanilla extract adds depth of flavor that complements both the chocolate and the crispy wafer bites.
Mix in Dry Ingredients and Chocolate
In a separate bowl, whisk together the 2 cups all-purpose flour, 0.5 teaspoon baking soda, and 0.5 teaspoon salt. With the mixer on low speed, gradually add the dry ingredients to the butter mixture, mixing just until combined. Be careful not to overmix—you should still see some small flour streaks in the dough.
Remove the bowl from the mixer and fold in the 1.5 cups dark chocolate wafer bites and 1 cup milk chocolate chips using a silicone spatula. The wafer pieces should be roughly chopped if they're not already. This step is where you get that signature Kit Kat crunch in every bite. Make sure the chocolate pieces are evenly distributed throughout the dough.
Chill the Dough for Perfect Texture
Cover the bowl with plastic wrap and refrigerate for at least 1 hour, or up to 24 hours. This chilling step is essential for two reasons: it helps the butter solidify slightly, which prevents the cookies from spreading too much in the oven, and it allows the flour to fully hydrate, creating a better texture.
I know it's tempting to skip this step, but don't. The chilled dough will give you those thick, crispy-edged cookies with gooey centers that everyone loves. If you're in a hurry, at least let the dough rest in the fridge for 30 minutes—it makes a noticeable difference. I like to make the dough the night before and bake fresh the next day for maximum flavor.
Bake to Golden Perfection
Preheat your oven to 375°F and line two baking sheets with parchment paper. Using a cookie scoop or tablespoon, drop the chilled dough onto the prepared baking sheets, spacing the cookies about 2 inches apart. They'll spread slightly during baking, but not too much thanks to that chilling step.
Bake for 10-12 minutes until the edges are golden brown but the centers still look slightly underdone. The cookies should be firm to the touch but not rock hard. They'll continue cooking on the hot baking sheet after you remove them from the oven. Let them cool on the baking sheet for 5 minutes before transferring to a wire rack to cool completely.
Dust with Powdered Sugar for Finishing Touch
Once the cookies are completely cool, dust the tops with the 0.25 cup powdered sugar using a fine-mesh sieve. This adds that classic cookie shop look and enhances the chocolate flavor. The powdered sugar should settle evenly over the tops of the cookies, creating a delicate, snowy appearance.
These cookies are best enjoyed fresh from the oven when the chocolate is still melty and the wafer pieces are perfectly crisp. Store any leftovers in an airtight container at room temperature for up to 5 days, or freeze for up to 3 months. The flavor only improves with time as the chocolate softens slightly and the wafer pieces maintain their crunch.
Pro Tips For Making Kit Kat Cookie
- CREAM BUTTER COLD: Take your unsalted butter straight from the fridge—no softening needed. I used to let it sit out, and the dough always turned greasy. Cold butter gives those Kit Kat cookies the perfect crumbly texture and prevents overmixing. Just cut it into small cubes and let the mixer do the work.
- WEIGH YOUR SUGARS: Packed brown sugar isn’t just "packed"—it’s firmly packed. Use a kitchen scale for accuracy, or at least press it down hard in the measuring cup. Too little brown sugar means less chewy center; too much makes the cookies spread like pancakes. Trust me, your cookies will thank you.
- UNDERMIX THE DOUGH: Stop mixing the second the dry ingredients just disappear. Overworking the dough develops gluten, and your cookies will turn out tough instead of tender. The moment you see a few flecks of flour, pull the mixer’s plug. Yes, it’ll look uneven—but that’s how you get the right texture.
- CHILL THE DOUGH TWICE: First chill (30 minutes) is non-negotiable, but add a second one after scooping. Warm dough spreads like crazy, and you’ll end up with flat, sad cookies. Pop the dough ball back in the fridge for 10-15 minutes before baking—your edges will stay thick and chewy. (I know, it’s extra steps, but it’s worth it.)
Wine and beer pairings for this recipe
Chocolatey Wine Pairings
The rich, buttery cookie dough and crispy chocolate wafer bites pair beautifully with Port wine—specifically a Ruby Port like Graham's 10-Year-Old. The caramel and dried fruit notes complement the cookies' chocolate and vanilla flavors without overpowering them. Serve slightly chilled for a sophisticated touch. 🍷
Creamy Dessert Wines
For a lighter option, try Moscato d'Asti—its sweetness and effervescence balance the cookies' richness. I recommend Saracco Moscato d'Asti for its crisp acidity and delicate floral notes. The bubbles also help cleanse your palate between bites, making each cookie taste even more indulgent.
Coffee-Inspired Pairings
If you're serving these cookies after dinner, pair them with a dark roast coffee like Peet's Major Dickason's Blend. The bold, slightly bitter notes contrast beautifully with the sweet, creamy cookies.
For an extra treat, add a splash of vanilla syrup to your coffee to enhance the cookie's vanilla flavor.
Beer Pairings for Contrast
A Belgian Dubbel like Westvleteren 8 brings deep malt and caramel flavors that stand up to the cookies' chocolate and buttery richness. The slight tartness in the beer cuts through the sweetness, creating a perfect balance.
For a lighter option, try a Belgian Witbier like Hoegaarden—its citrusy notes add a refreshing contrast. 🍺
Seasonal Adaptations
In warmer months, swap the wine for a sparkling rosé like La Crema Sonoma Rosé. The crisp acidity and berry notes complement the cookies' chocolate while keeping the meal light.
For winter gatherings, a spiced red wine like Mulled Cabernet adds warmth and depth that pairs perfectly with the cookies' rich flavors.
Non-Alcoholic Options
For guests who prefer non-alcoholic drinks, chocolate milk made with whole milk and a splash of vanilla extract is a crowd-pleaser. The creaminess mirrors the cookies' texture, while the chocolate enhances the flavor. For something more sophisticated, try sparkling apple cider—its slight tartness balances the sweetness beautifully. 🍎
Nutrition facts
Frequently asked questions
Can I make these cookies without Kit Kat bars?
While Kit Kat bars give the signature crunch, you can substitute with Crunchie or Butterfinger bars chopped into small pieces. For a chocolatey alternative, try chopped dark chocolate-covered pretzels or crushed graham crackers mixed with chocolate chips. Just adjust the amount to 1.5 cups total for best texture.
Why do I need to chill the dough?
Chilling the dough for at least 1 hour prevents excessive spreading while baking, giving you those thick, crispy edges. It also lets the flour hydrate properly, creating a better texture. Skipping this step often results in flat, cakey cookies instead of the signature crispy-soft balance you want.
Can I bake these cookies ahead of time?
Yes! Bake them up to 3 days ahead and store in an airtight container at room temperature. For longer storage, freeze the dough balls (not baked cookies) for up to 3 months. When ready to bake, add 1-2 minutes to the baking time. The flavor actually improves as the chocolate softens slightly.
What if my cookies spread too much?
Over-spreading usually means the dough wasn't chilled long enough or the butter was too soft. Next time, chill the dough for 2 hours and use cold butter (not room temperature). Also try baking on a lower rack in your oven for more even heat distribution. The cookies should hold their shape while still being tender.
How do I make these cookies gluten-free?
Replace the 2 cups all-purpose flour with a 1:1 gluten-free baking flour blend like Bob's Red Mill. Add 0.5 teaspoon xanthan gum to help bind the dough. You may need to adjust baking time by 1-2 minutes longer, as gluten-free cookies can bake differently. Test one first!