Main Courses
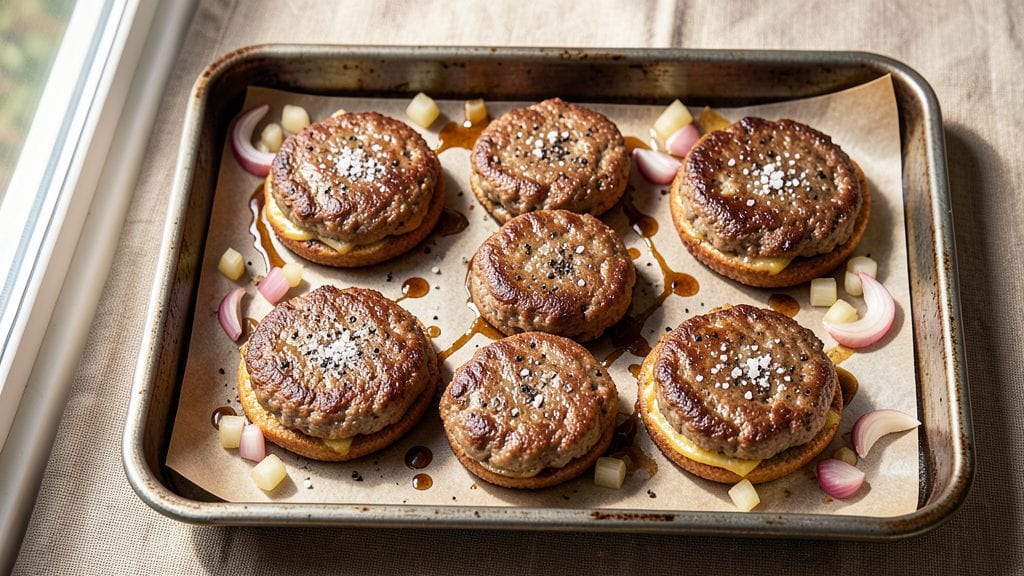
Creating cookie sheet sliders with juicy centers is the perfect way to serve mini burgers without the fuss of grilling or frying. These bite-sized treats cook evenly on a sheet pan, delivering tender meat and crispy buns every time.
I developed this recipe after testing countless methods to ensure maximum flavor and ease of preparation.
The secret lies in the right balance of ingredients and cooking technique. Ground beef with a touch of Worcestershire sauce keeps the meat moist, while a quick sear in the oven creates a flavorful crust.
The sliders assemble in minutes, making them ideal for game day, parties, or a casual weeknight dinner.
What you’ll end up with is a tray of perfectly proportioned sliders—juicy, flavorful patties nestled in soft buns, ready to be topped with your favorite condiments. The oven method ensures consistent cooking, so no slider turns out dry or overcooked. This recipe delivers restaurant-quality results with minimal effort.
Serve these sliders as an appetizer, main course, or snack—each bite is packed with flavor and fun. Perfect for feeding a crowd or enjoying a smaller portion, they’re versatile enough to adapt to any occasion. Let’s get started on making these crowd-pleasing mini burgers!
Ingredients for cookie sheet sliders
Juicy sliders start with quality ground beef and simple pantry staples for perfect mini burgers.
| Ingredient | Amount | Notes |
|---|---|---|
| Ground Beef 🥩 | 1 ½ lb | 80/20 fat ratio preferred |
| Yellow Onion 🧅 | ½ cup | Finely diced, fresh preferred |
| Garlic Cloves 🧄 | 4 cloves | Minced, fresh preferred |
| Worcestershire Sauce 🍶 | 1 tbsp | For umami depth |
| Kosher Salt 🧂 | 1 ½ tsp | Adjust to taste |
| Ground Black Pepper 🌶️ | 1 tsp | Freshly ground preferred |
| Hamburger Buns 🍞 | 12 whole | Mini slider buns preferred |
| Mayonnaise 🥛 | ¼ cup | For topping |
| Yellow Mustard 🍯 | 2 tbsp | For topping |
| Ketchup 🍅 | 2 tbsp | For topping |
| Extra-Virgin Olive Oil 🫒 | 1 tbsp | For searing |
| Unsalted Butter 🧈 | 1 tbsp | For crisping buns |
| American Cheese Slices 🧀 | 12 slices | For melting |
The ground beef is non-negotiable—80/20 fat ratio ensures juicy sliders. Kroger or Costco typically carry this pre-packaged for convenience, but grab it from the butcher section if you can. Look for bright red color and visible fat marbling. The yellow onion should be crisp and firm, not wilted or sprouting. Fresh garlic cloves should smell pungent, not musty. For Worcestershire sauce, Lea & Perrins is the standard, but any quality brand works. The mini slider buns? Trader Joe's has excellent ones, but any small hamburger buns will do.
No Worcestershire? Soy sauce or balsamic vinegar adds depth, though nothing quite replaces the umami. Short on American cheese? Mozzarella or cheddar work in a pinch, but they won't melt as smoothly. The mayo, mustard, and ketchup can be store-bought or homemade—just ensure they're fresh. For the olive oil, California extra-virgin brands like Kirkland or Prima Donna add subtle flavor. The butter? Full-fat, unsalted is ideal for crisping the buns—don't use margarine. If you're prepping ahead, shape the patties and store them on a tray in the fridge for up to 2 days.
These sliders reheat beautifully—350°F for 5 minutes restores the crisp. Store leftovers in an airtight container for 3 days, or freeze for 2 months. For parties, assemble everything ahead, then bake straight from the fridge. The cheese will melt perfectly, and the buns will crisp up nicely. Double the batch—they disappear fast.
Why You'll Love This Recipe
- One-Pan Wonder: I swear by this for nights when I’d rather scroll than scrub. Brown the beef right on the sheet pan, toss in diced onion and minced garlic—no extra pots, no extra stress. Just 20 minutes of hands-off cooking while the Worcestershire sauce works its magic.
- Umami Bomb: That splash of Worcestershire? It’s the secret weapon here. The beef stays juicy, the onions caramelize just enough, and the garlic? Oh, it’s there—like a warm hug in every bite. Not fancy, but dangerously addictive.
- Tailgate or Taco Night: Honestly, these sliders are my go-to for anything. Serve them on toasted buns for game day, stuff them in tortillas for tacos, or just eat them straight off the pan when I’m lazy. (Yes, even on a Tuesday night.)
- Budget-Friendly Leftovers: Ground beef stretches far, and these sliders reheat like a dream. I make a double batch on Sundays, freeze half, and still have lunch for the week. No sad, dry meat here—just rich, flavorful bites waiting to be reheated.
Step-by-step instructions for cookie sheet sliders recipe
Here's how to make perfectly juicy mini burgers with crispy edges and melty cheese every time.
Prepare the Burger Patties
In a medium bowl, combine the 1.5 lb ground beef, 0.5 cup finely diced yellow onion, 4 minced garlic cloves, 1 tbsp Worcestershire sauce, 1.5 tsp kosher salt, and 1 tsp freshly ground black pepper. Using your hands, gently mix until just combined—don't overwork the meat or the sliders will become dense. Divide the mixture into 12 equal portions (about 2 tablespoons each) and roll them into balls between your palms.
Flatten each ball into a ¼-inch thick patty using your fingers, creating a slight dimple in the center. This prevents bulging during cooking. Place the patties on a plate and let them rest at room temperature for 15 minutes before cooking. This step ensures even cooking and maximum juiciness in the final sliders.
Sear the Patties for Maximum Flavor
Heat a cookie sheet in the oven at 425°F for 5 minutes to preheat it. While it's heating, place 1 tbsp extra-virgin olive oil in a large nonstick skillet over medium-high heat. Once the oil shimmers, add 6 of the patties (work in batches to avoid crowding) and cook for 2 minutes per side until they develop a deep golden-brown crust and internal temperature reaches 145°F.
Remove the patties from the skillet and place them on the preheated cookie sheet. Top each with 1 slice of American cheese. Return the cookie sheet to the oven and broil for 1 minute until the cheese melts completely and forms a bubbly, golden crust. Repeat with the remaining 6 patties. The broiling step ensures that cheese melts perfectly while keeping the patties juicy.
Assemble the Sliders
In a small bowl, mix together the 0.25 cup mayonnaise, 2 tbsp yellow mustard, and 2 tbsp ketchup to create the slider sauce. Lightly toast the 12 whole hamburger buns in the same skillet over medium heat for 30 seconds per side until they're just warm and slightly crispy. Spread 1 teaspoon of the sauce on the bottom half of each bun.
Place each cheese-topped patty onto the bottom buns, pressing down gently to ensure they stick. Top with the remaining bun halves. The warm buns will help the cheese stretch slightly, creating that classic slider texture. Keep the assembled sliders warm in a 200°F oven for 5 minutes while you finish the rest.
Finish with Crispy Buns and Perfect Timing
Before serving, melt the 1 tbsp unsalted butter in the same skillet over low heat. Using a spatula, lightly brush the tops of all 12 sliders with the melted butter. This adds an extra layer of crispiness and richness that complements the savory patties and melty cheese.
Serve immediately while the sliders are still warm and the buns are crispy. Each slider should have a juicy, perfectly cooked patty with melted cheese, a crispy bun, and that signature slider sauce. The high-heat searing combined with the oven broil ensures maximum juiciness while the crispy buns and buttery finish deliver on the classic slider experience.
Pro Tips For Making Cookie Sheet Sliders
- CRUSH THE ONIONS: Dice them small—think 1/4-inch pieces or finer. I used to leave them chunky, and they’d turn to mush under the beef. Tiny pieces cook faster and blend right into the mix without a single chewy bite.
- SALT THE BEEF FIRST: Toss the raw ground beef with 1 teaspoon of kosher salt before cooking. It breaks down the proteins just enough to keep the sliders juicy, and you won’t taste the salt later—trust me, I’ve overdone it.
- DON’T OVERMIX THE BATCH: Once you add Worcestershire and garlic, stir just until combined—lumps are fine. Overworking the beef makes sliders dense. I learned this after squishing a batch into hockey pucks by accident.
- USE A SPATULA, NOT FINGERS: Slide the beef mixture onto the cookie sheet with a thin spatula, not your hands. It keeps portions even, prevents sticking, and saves you from scrubbing grease off your fingers mid-cook (yes, I’ve done that too).
Make-ahead tips for this cookie sheet sliders
Prep Ahead Strategy
Shape the patties up to 2 days ahead and refrigerate them on a tray lined with parchment paper. This prevents sticking and makes assembly easier later.
I like to store them in a single layer on a 13x9-inch cookie sheet—just cover with plastic wrap and keep them in the fridge. When ready to cook, let them sit at room temperature for 15 minutes before searing. 💡
Freezer-Friendly Assembly
For a month-ahead prep, assemble the sliders completely (patties + buns + sauce) and freeze them on a tray before transferring to a ziplock freezer bag. When ready to serve, bake straight from frozen at 375°F for 15 minutes—no thawing needed.
The cheese will still melt perfectly, and the buns will crisp up nicely. Label your bags with the date to track freshness.
Condiment Prep
Mix the mayo, mustard, and ketchup sauce in advance and store it in a small glass jar with a tight-sealing lid. This keeps the ingredients fresh for up to 5 days in the fridge.
I also recommend pre-slicing any toppings like pickles or onions and storing them in airtight containers. This saves time during the final assembly and ensures everything is ready to go. ✨
Bun Storage Tips
Keep the mini slider buns in a paper bag at room temperature for up to 3 days or freeze them in a ziplock bag for 2 months.
To toast them later, simply pop them in a skillet or toaster oven for 30 seconds per side—they’ll stay fresh and crispy. Avoid refrigerating buns longer than 24 hours, as they can dry out. 🍞
Cheese Hack
Slice the American cheese 1 day ahead and store it in a single layer on parchment paper between sheets of wax paper. This prevents sticking and makes it easy to grab slices when needed.
For extra convenience, wrap the cheese slices in plastic wrap and freeze them—they’ll thaw quickly in the oven while the sliders cook. 🧀
Batch Cooking Timeline
Here’s my foolproof timeline for making a crowd-pleasing batch: Shape patties Day 1, prep condiments and slice cheese Day 2, and assemble everything 1 hour before serving.
The sliders stay warm in a 200°F oven for up to 30 minutes, so you can focus on sides or drinks. This method ensures minimal last-minute stress and maximum flavor. 💪
Nutrition facts
Frequently asked questions
Can I use chicken or pork instead of beef for these sliders?
Ground chicken or pork works beautifully—just adjust the cooking time slightly. For chicken, cook to 165°F internal temp, and for pork, aim for 145°F. The patties should still be ¼-inch thick for even cooking. Use the same sear-and-broil method for perfect results.
How do I keep the sliders warm before serving a crowd?
Place assembled sliders on a cookie sheet and keep them in a 200°F oven for up to 30 minutes. For larger groups, use two trays and rotate them every 10 minutes. Avoid stacking—they'll lose crispiness. A slow cooker on warm also works for 1 hour if you're prepping ahead.
Why did my slider buns get soggy?
Soggy buns usually happen from steam or over-basting. To fix this, toast buns separately until crisp, then assemble sliders just before serving. For extra insurance, brush the bottom buns with 1 tbsp melted butter before adding patties. Keep assembled sliders uncovered until ready to serve.
Can I make these sliders ahead and reheat them?
Yes! Assemble sliders completely, then refrigerate for up to 24 hours before baking. Reheat at 350°F for 10-12 minutes until warm through. For frozen sliders, bake straight from frozen at 375°F for 15 minutes. The cheese will still melt perfectly, and buns will crisp up nicely.
What's the best way to serve these sliders for a party?
Arrange sliders on a large platter with extra sauce in small bowls for dipping. Add toppings like pickles, jalapeños, or bacon bits in separate dishes. For a fun presentation, use a cookie sheet as a serving tray—it keeps everything warm and easy to grab. Serve with sweet potato fries or a simple salad for a complete spread.